Building an Active Directory Home Lab
Home LabA self-driven home lab project where I installed Windows Server 2019, promoted it to a domain controller, and built out a full Active Directory environment — including Organizational Units, security groups, users, and Group Policy Objects — to practice real-world enterprise IT administration.
1Windows Server Setup
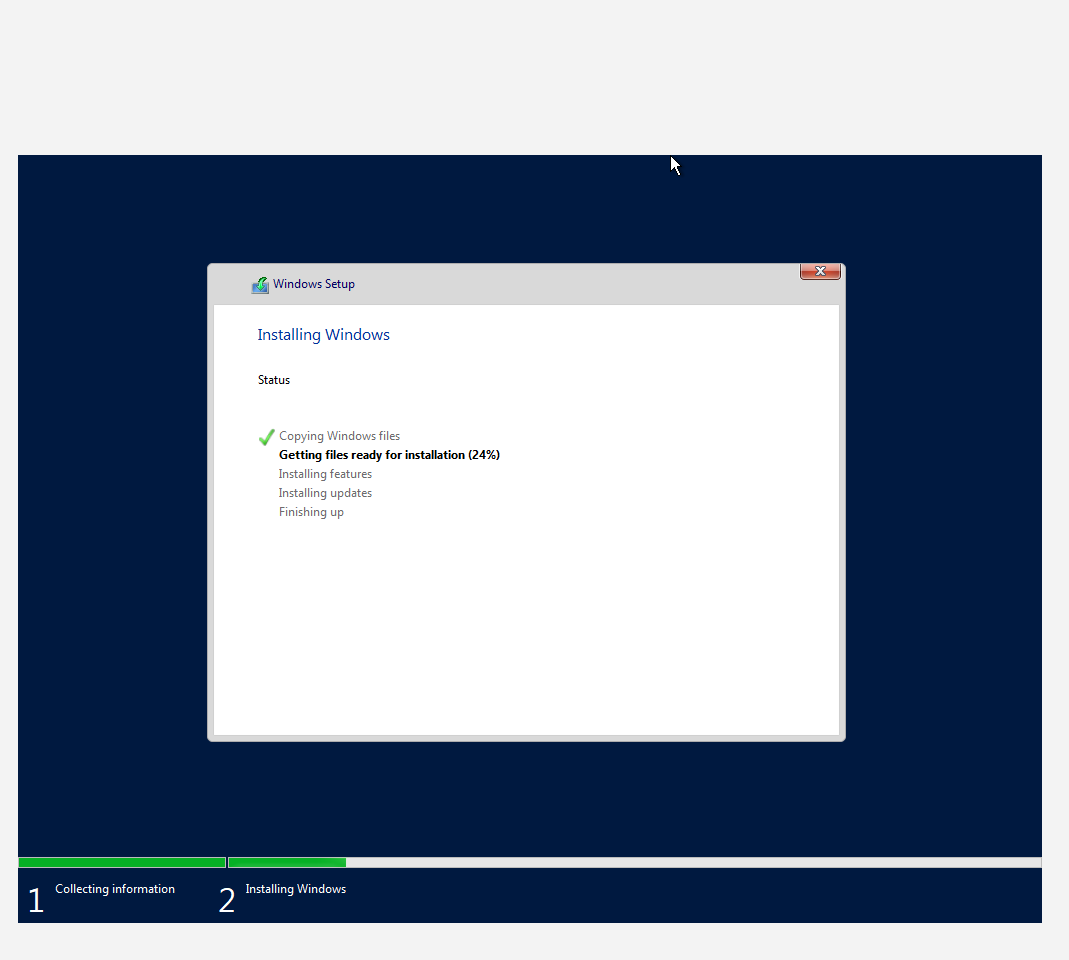
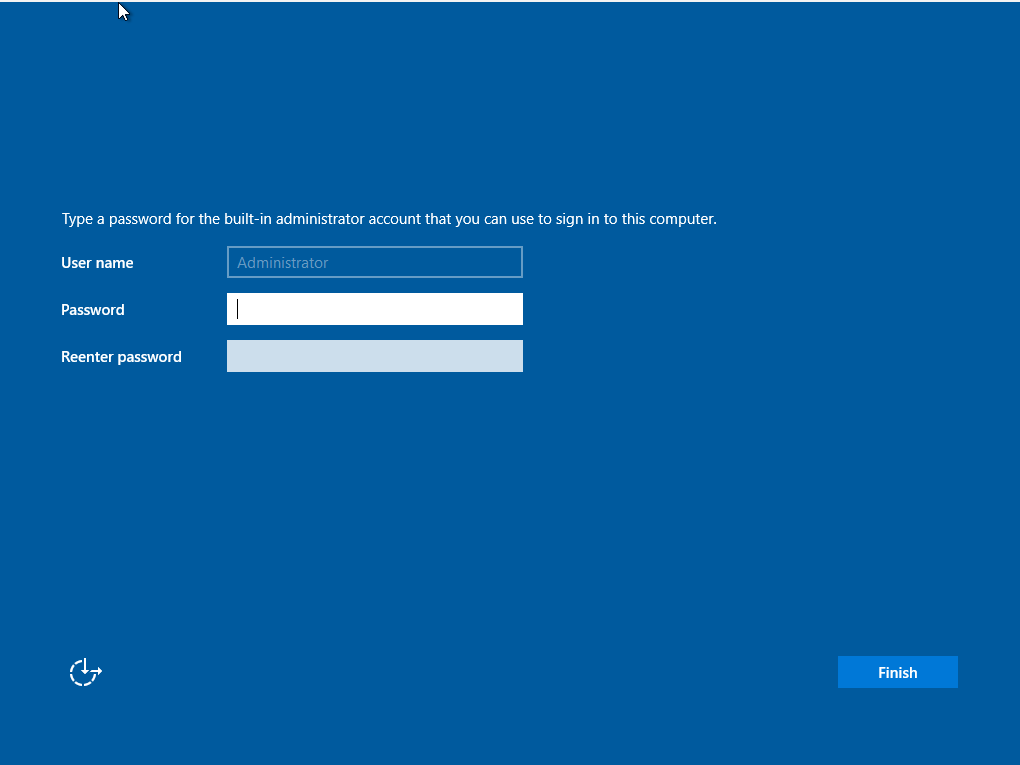
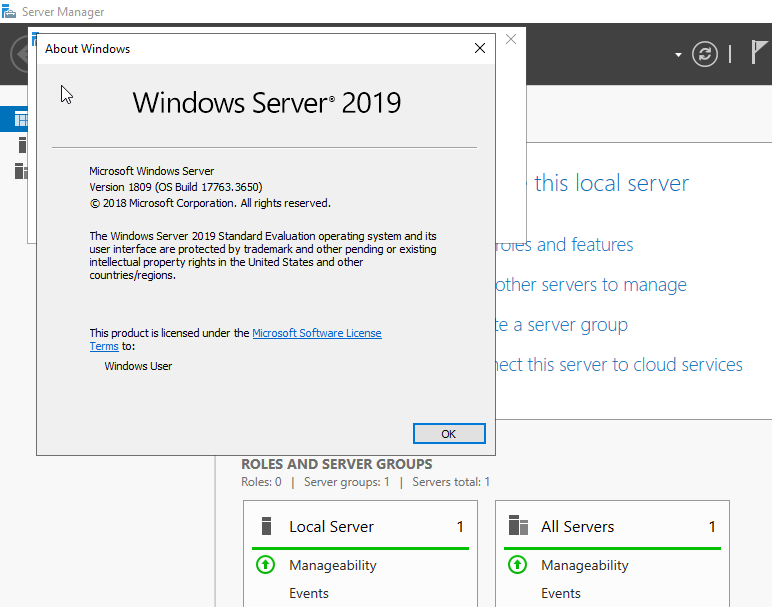
Installed Windows Server 2019 Evaluation inside a virtual machine as the foundation for the lab environment.
| Setting | Value |
|---|---|
| Operating System | Windows Server 2019 Evaluation |
| Architecture | 64-bit (x64) |
| Version | 1809 (OS Build 17763.3650) |
2Server Manager Dashboard
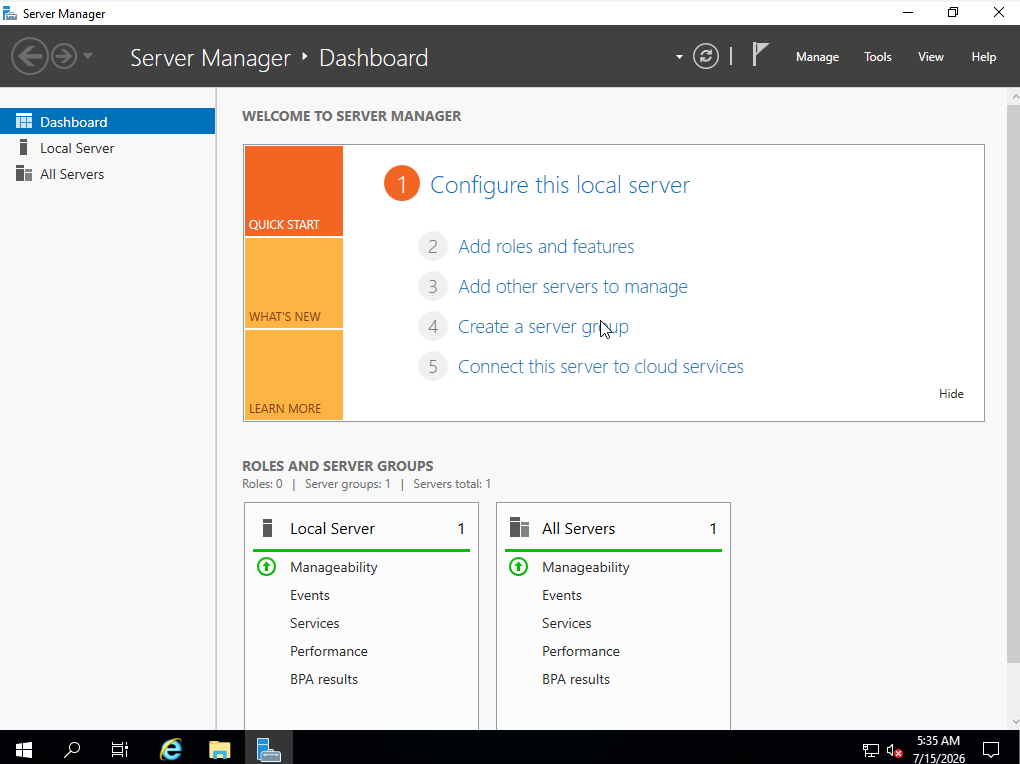
Server Manager is the primary management console in Windows Server. It's used to configure the server, install roles and features, monitor system status, and manage the services required for the Active Directory environment.
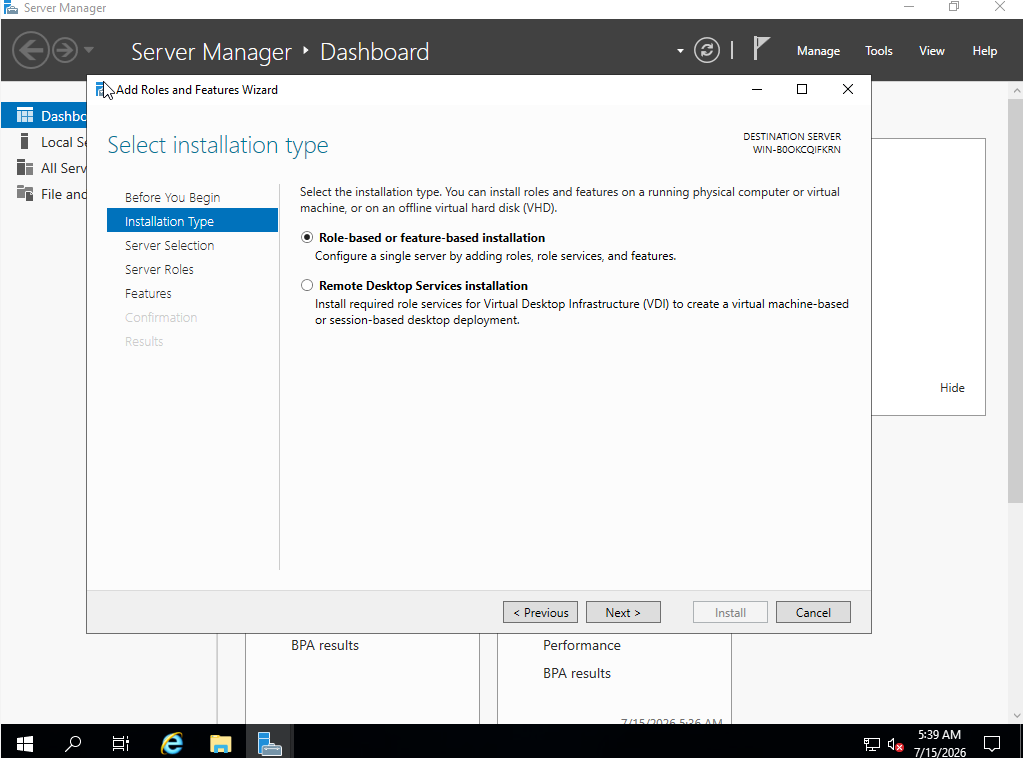
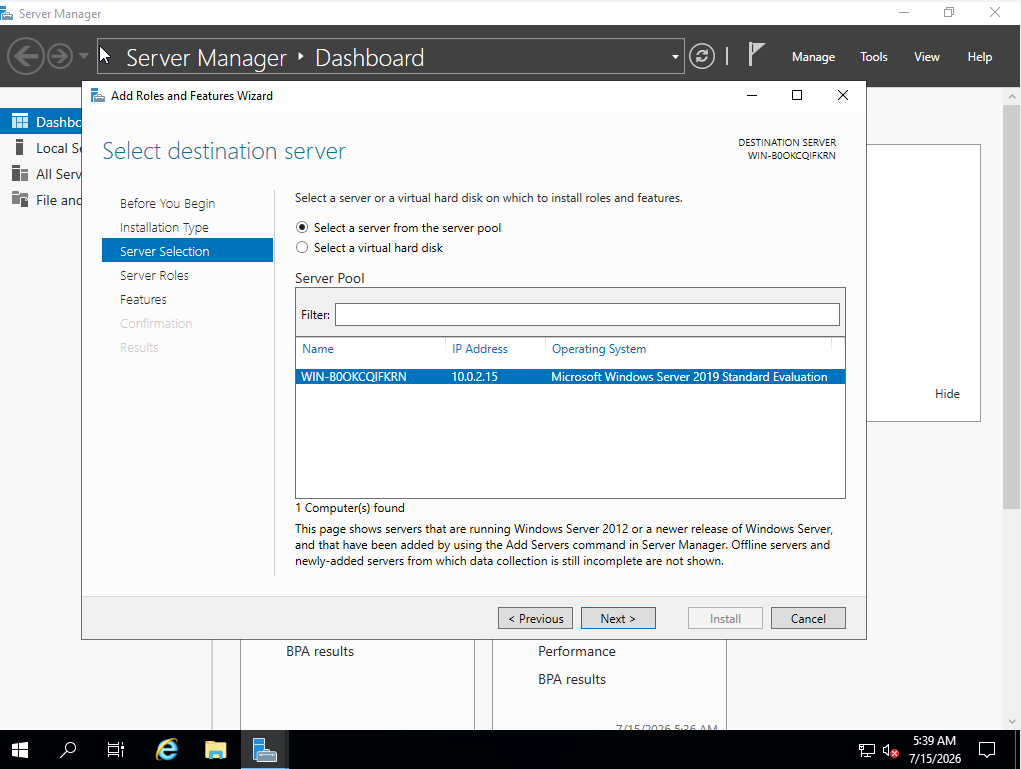
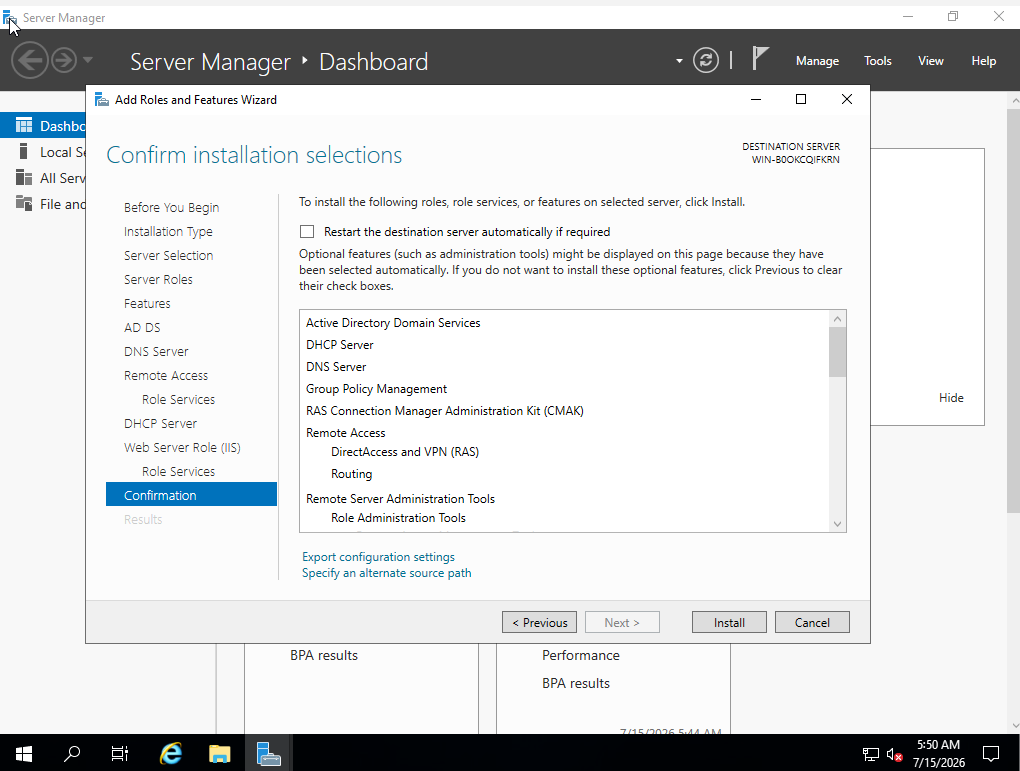
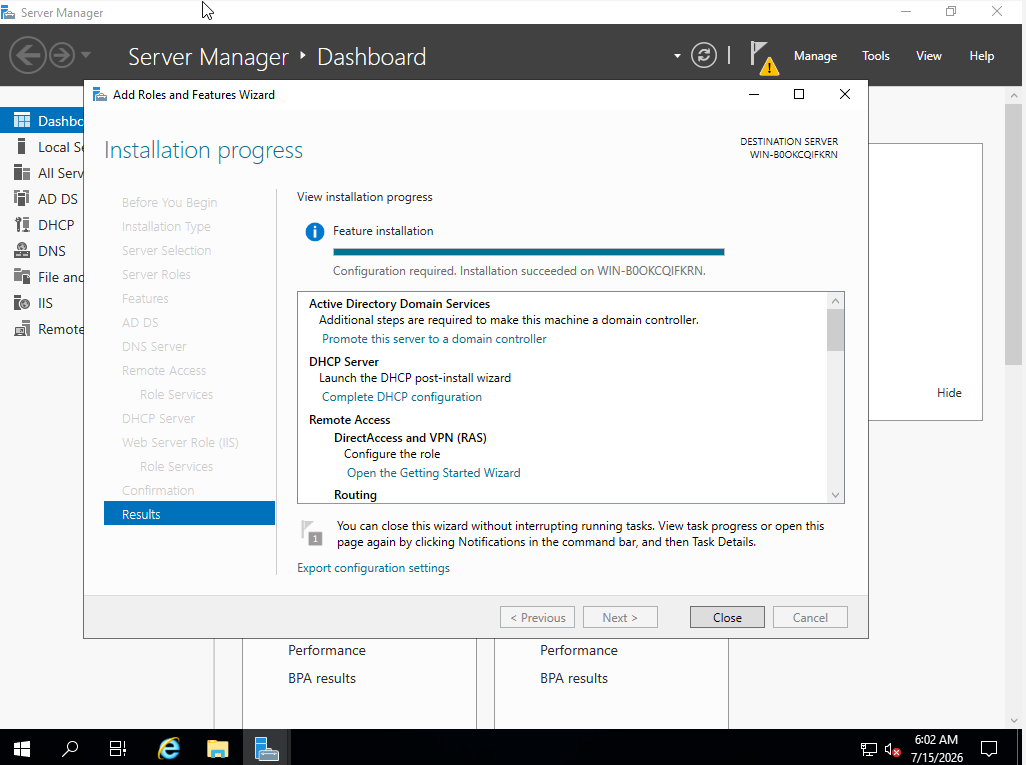
Add Roles and Features Wizard
Used the wizard to install Active Directory Domain Services (AD DS), along with DHCP, DNS, and Remote Access roles required for the lab.
3Promoting the Server to a Domain Controller
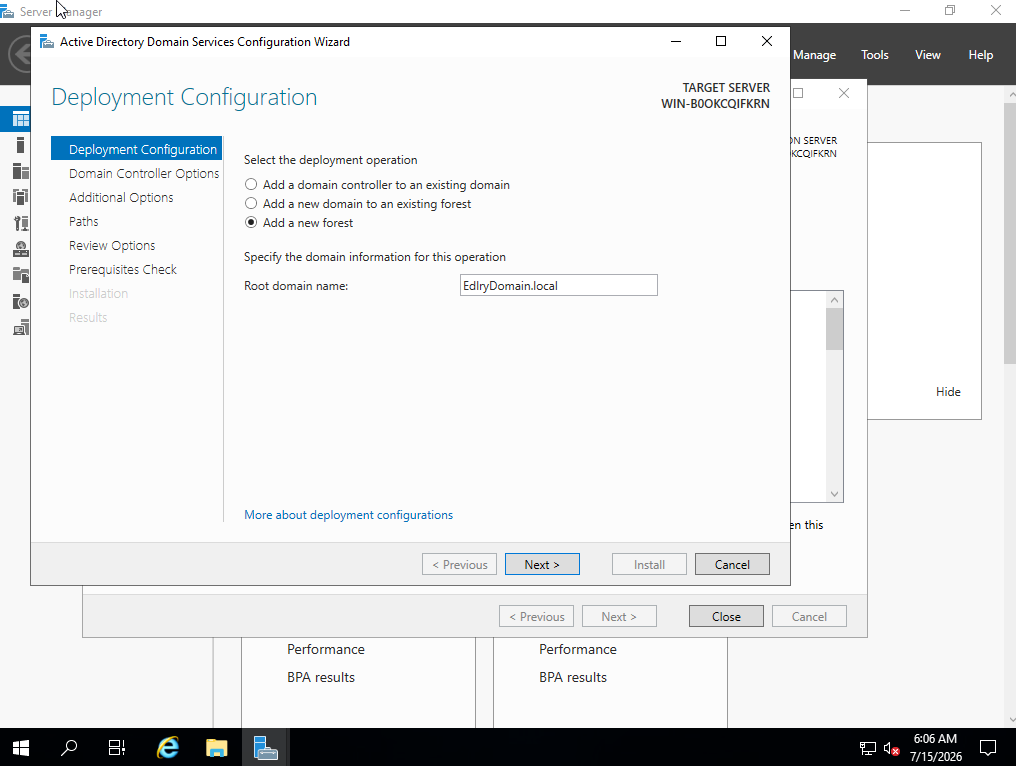
Configured the server as a new Active Directory forest, specifying a root domain name for the environment.
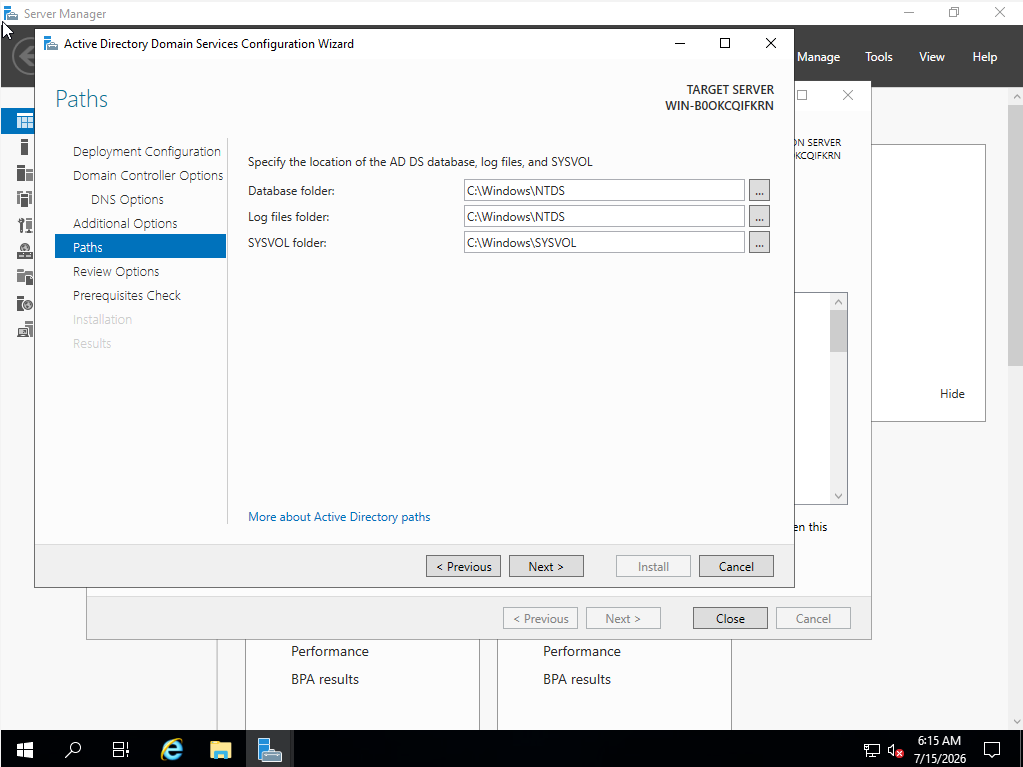
Paths
Specified the default locations for the AD DS database, log files, and SYSVOL folder.
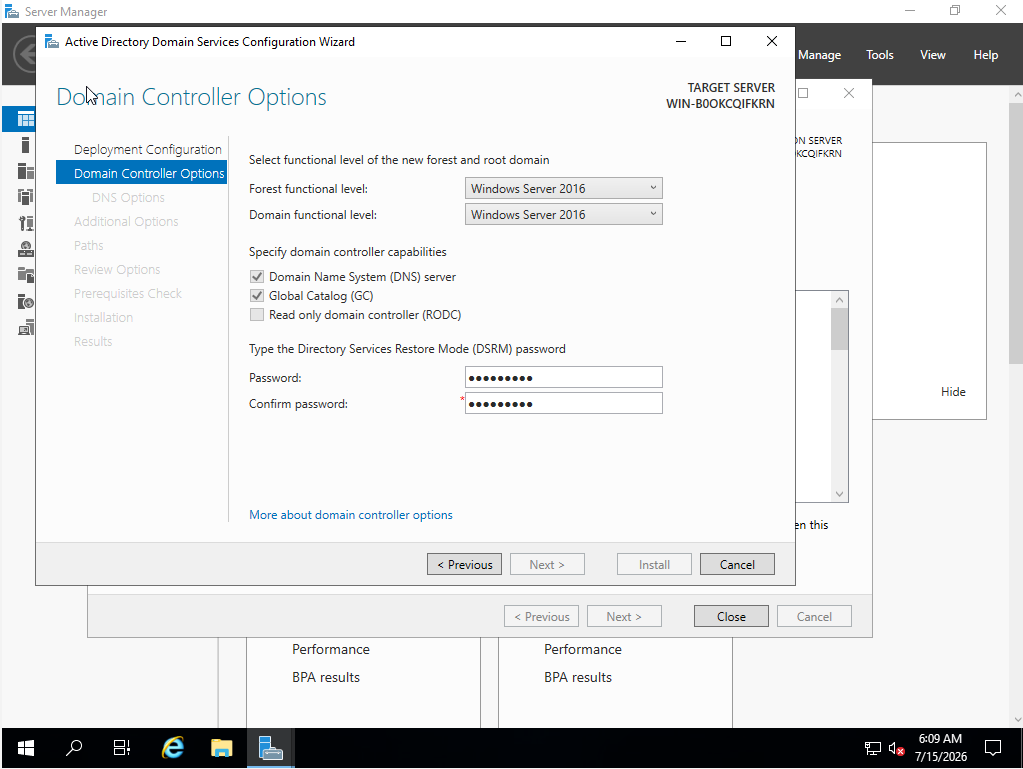
Domain Controller Options
Set the forest and domain functional levels to Windows Server 2016, enabled DNS server and Global Catalog, and set the Directory Services Restore Mode (DSRM) password.
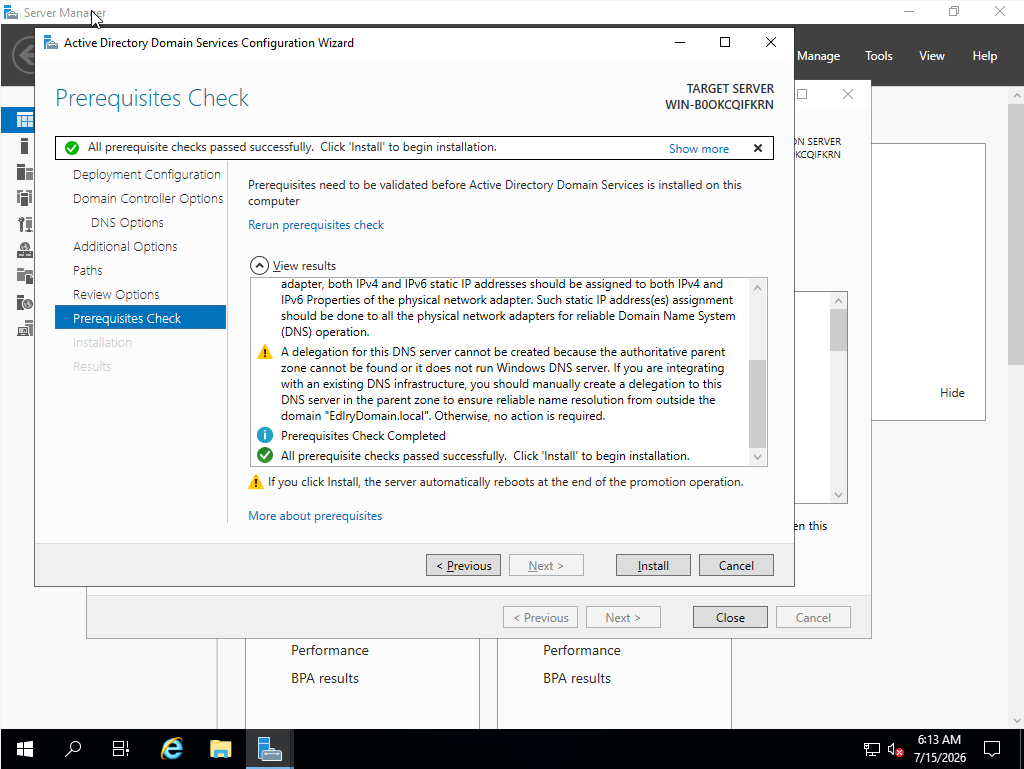
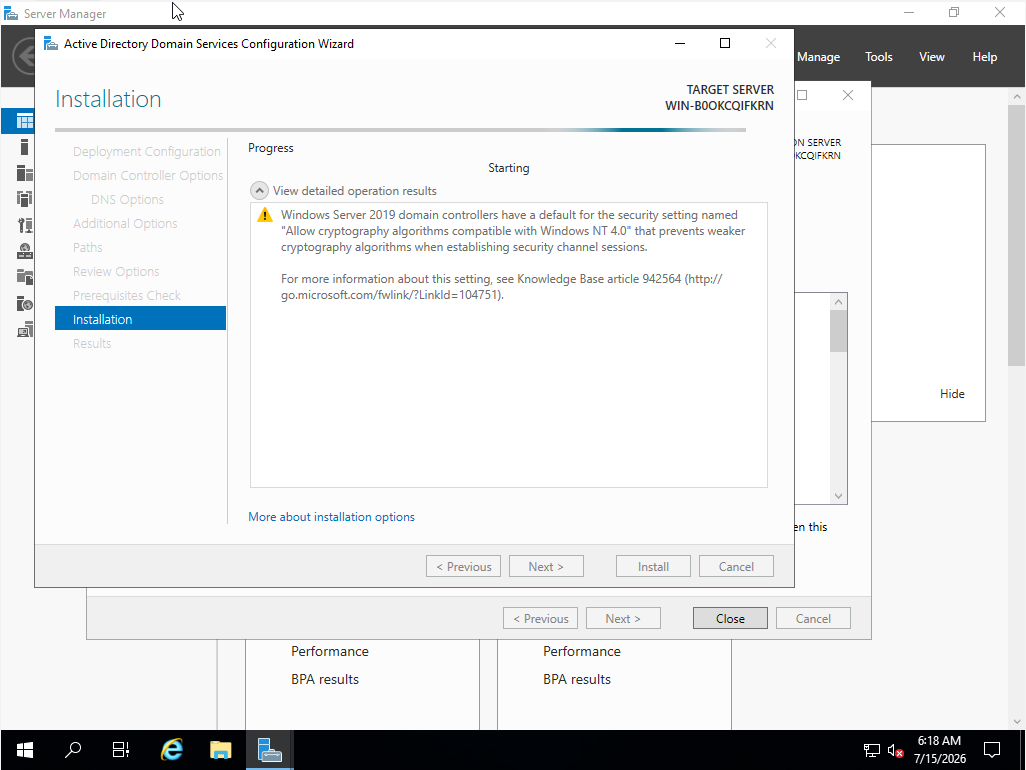
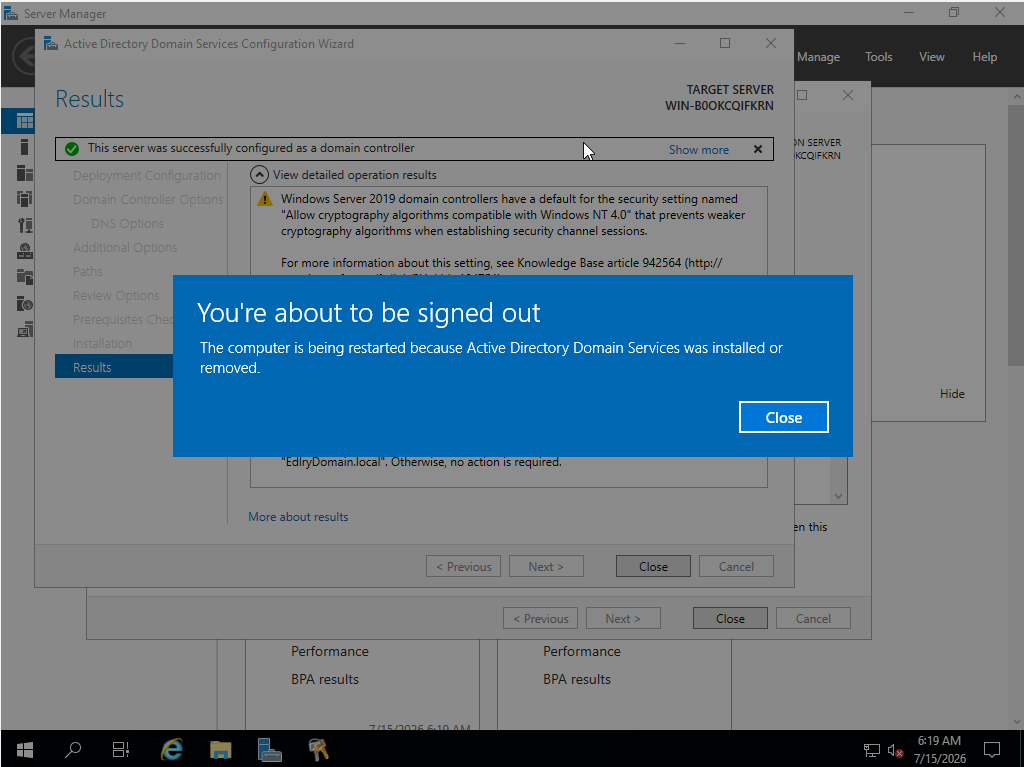
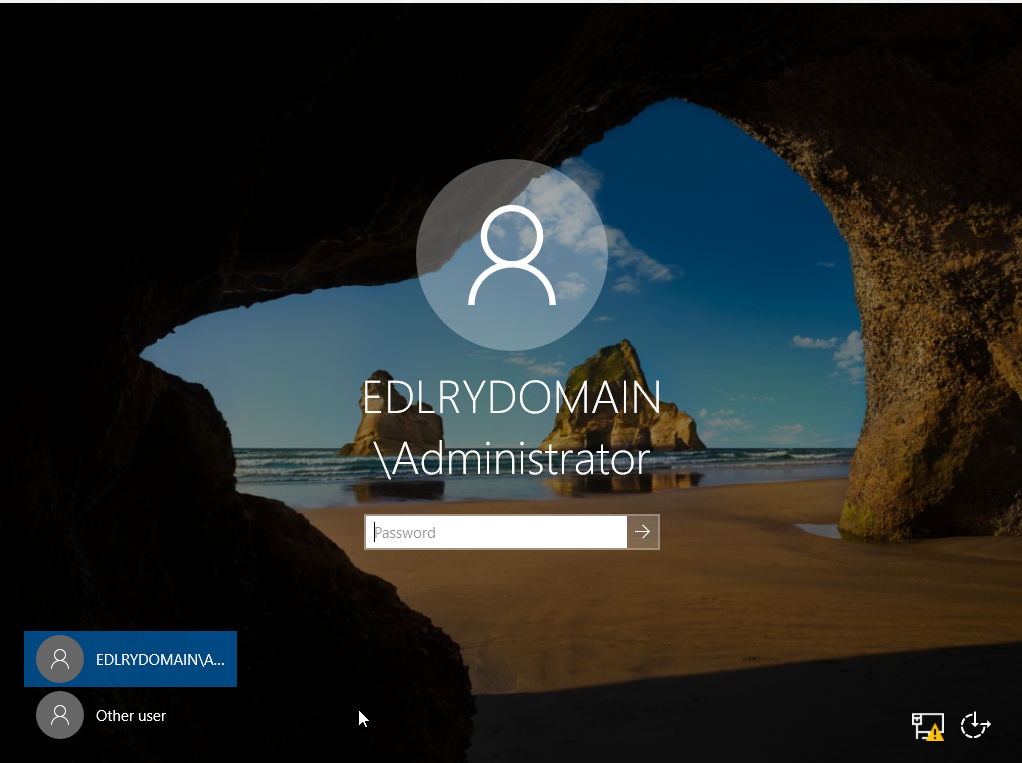
Domain Controller Login
The login screen displayed the newly created Active Directory domain, confirming the server was now operating as the domain controller for the EDLRYDOMAIN domain.
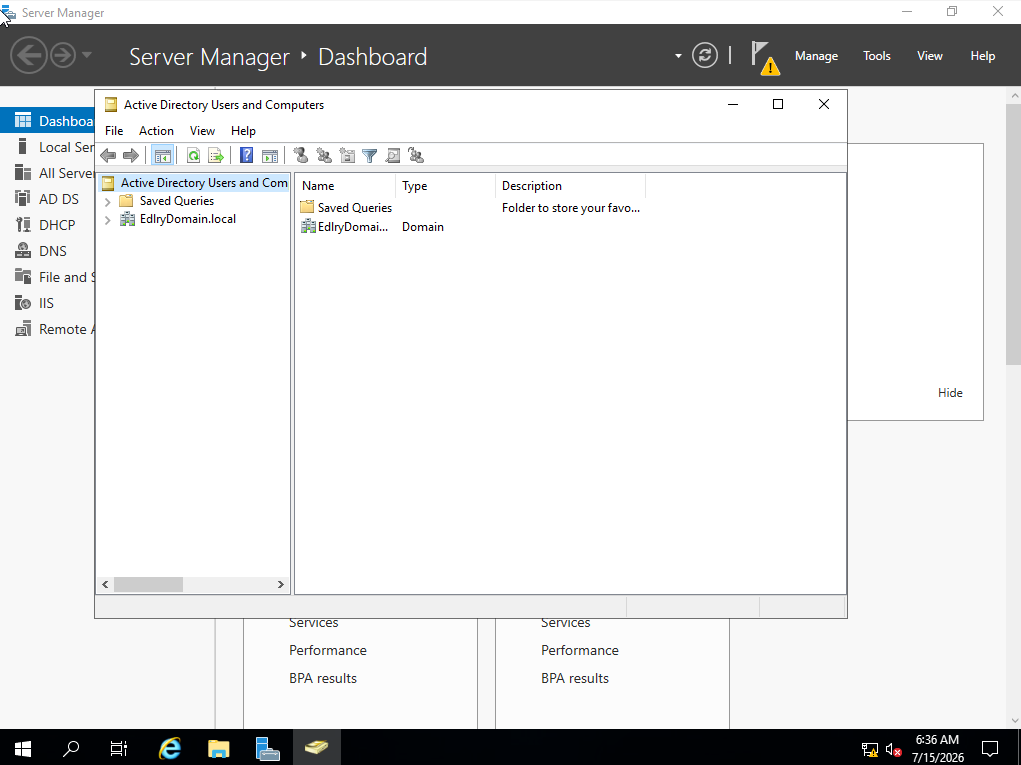
4Active Directory Users and Computers (ADUC)
ADUC is the primary administrative tool used to manage objects within an Active Directory domain — creating and managing user accounts, computer accounts, security groups, and Organizational Units (OUs). Used here to organize and administer the EDLRYDOMAIN domain after AD DS installation.
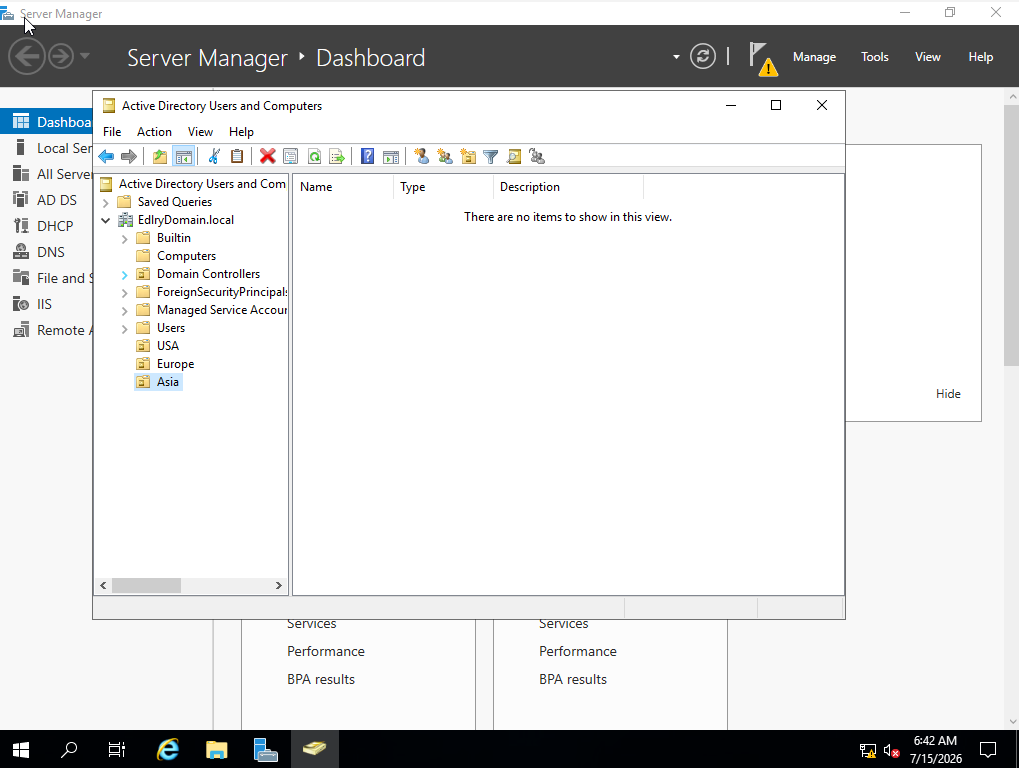
Creating Organizational Units for Regions
Created top-level OUs to organize the domain by region: USA, Europe, and Asia. OUs provide a logical structure that simplifies management and allows Group Policies to be applied to specific sections of the domain.
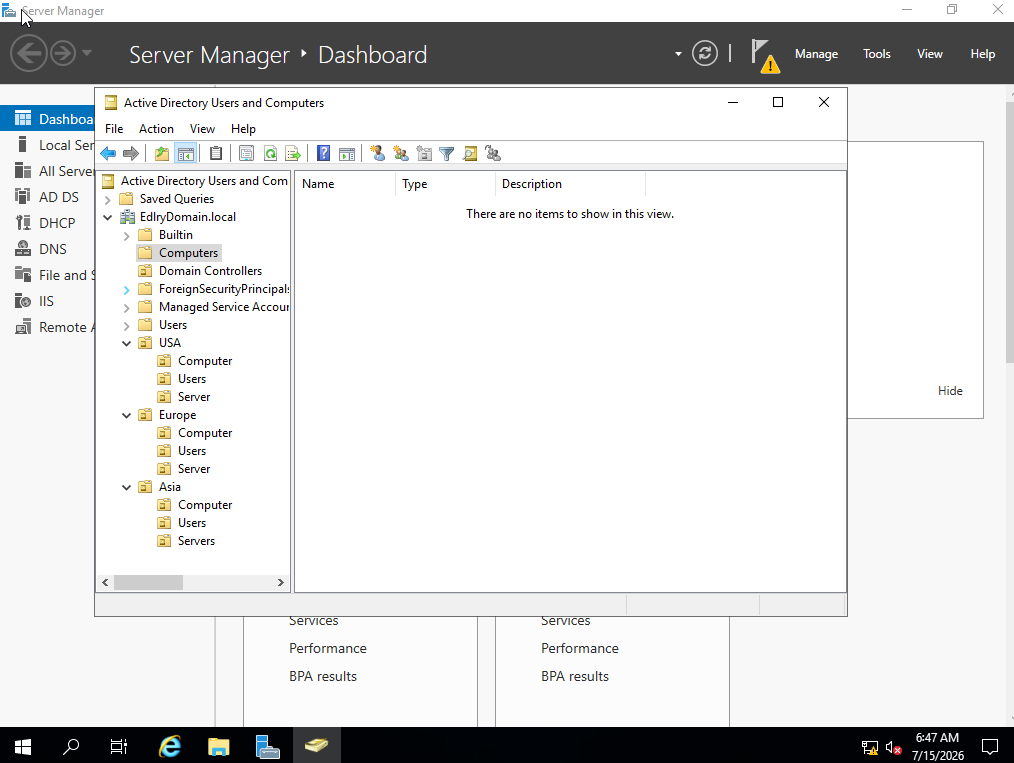
Creating Departmental Sub-OUs
Inside each regional OU, created sub-units for Computers, Users, and Servers to separate resource types and simplify administration.
5Security Groups and Users
Before creating accounts, reviewed the different group scopes and types available in Active Directory:
| Group Scope | Possible Members | Notes |
|---|---|---|
| Universal | Accounts from any domain | Usable across the entire forest / trusting forests |
| Global | Accounts from the same domain | Usable in the same forest or trusting domains/forests |
| Domain Local | Accounts from any domain or trusted domain | Usable within the same domain only |
| Group Type | Purpose |
|---|---|
| Security Groups | Assign permissions to shared resources and user rights (e.g. Domain Admins, Finance Department access) |
| Distribution Groups | Create email distribution lists to send mail to a collection of users via an email/exchange server |
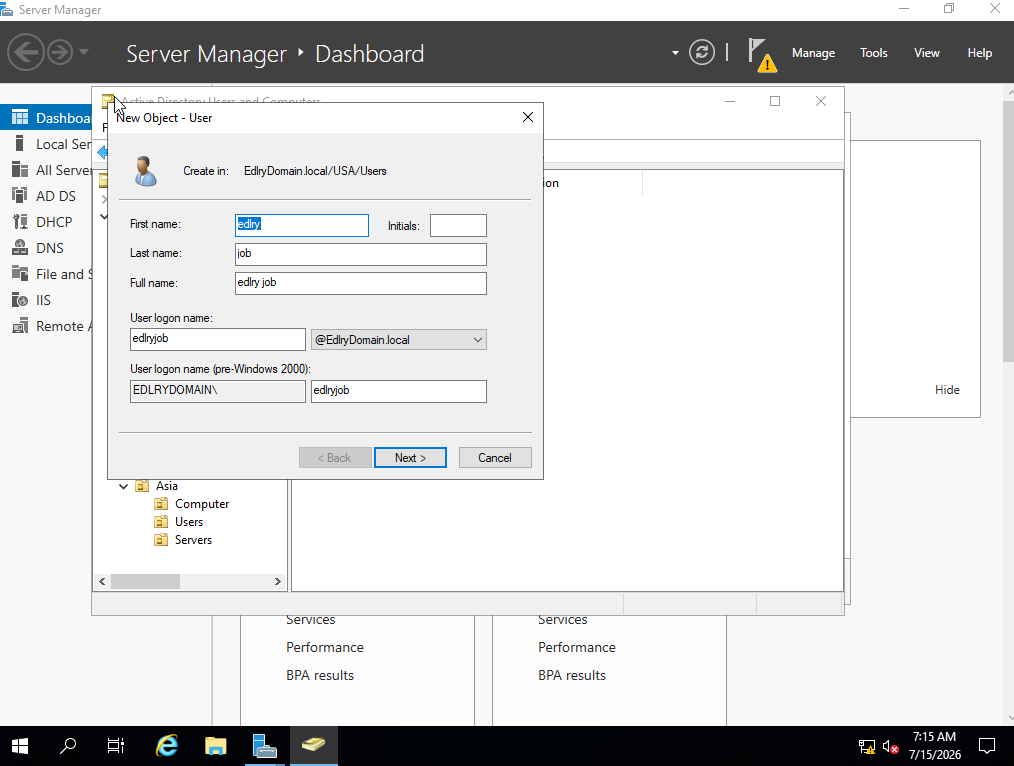
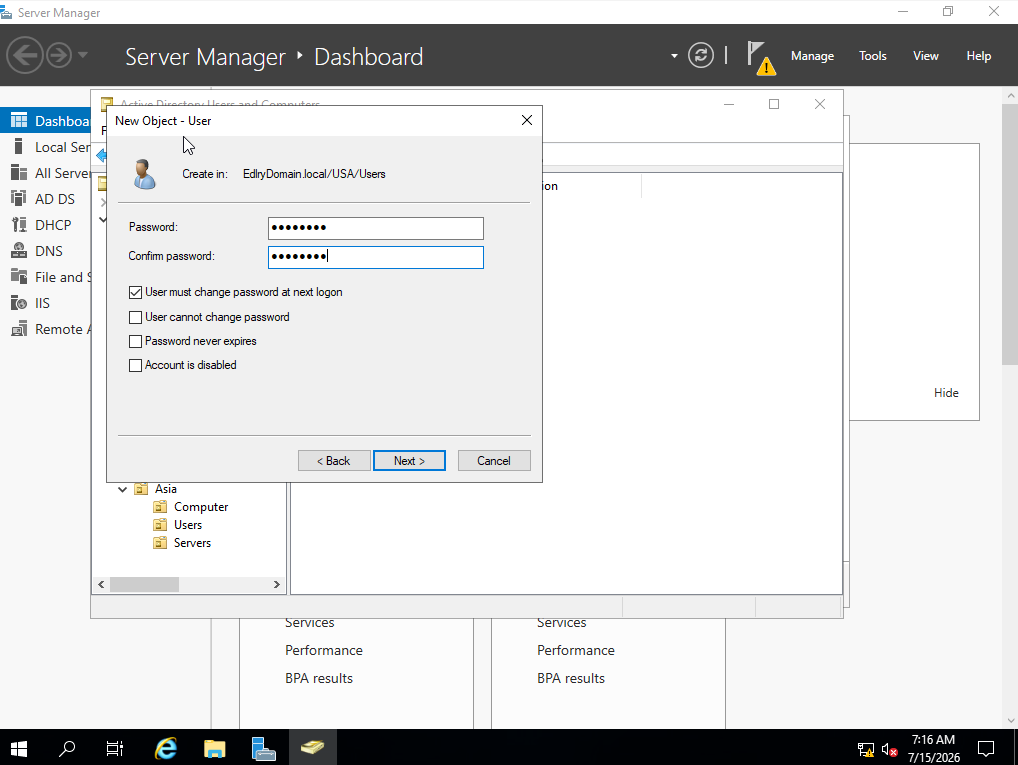
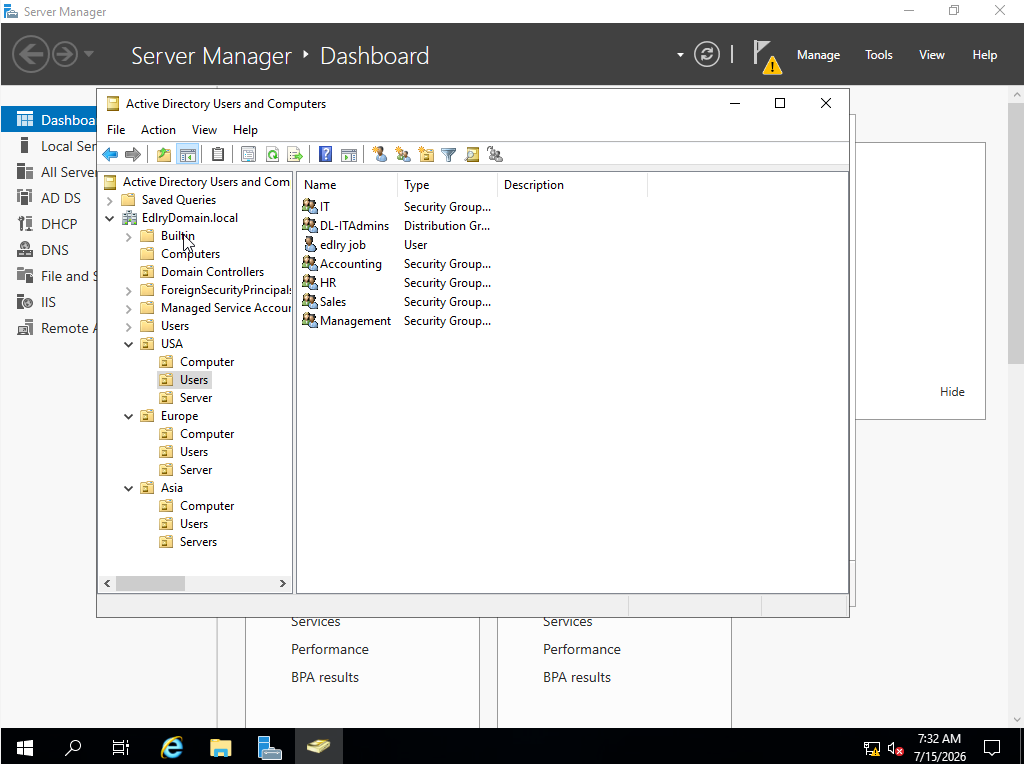
Created security groups and departmental accounts across all regional OUs — IT, Accounting, HR, Sales, and Management — for the USA, Europe, and Asia regions.
6Group Policy Management
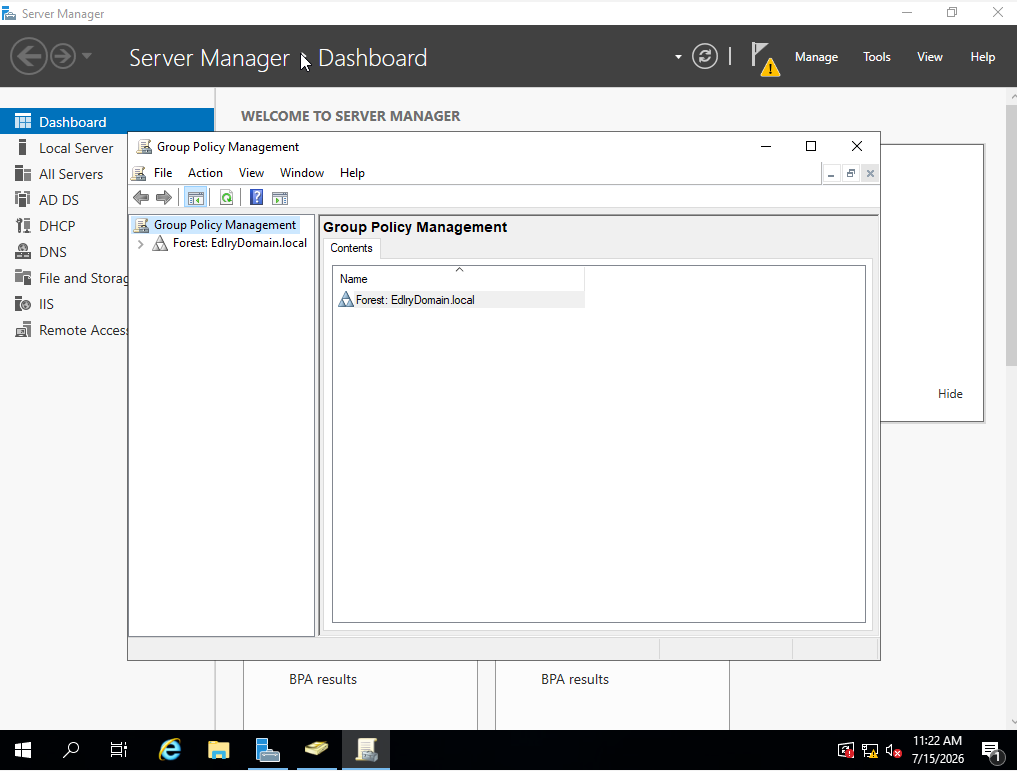
Group Policy provides centralized administration of user and computer settings across a Windows network using Active Directory — allowing standardized configurations, security rules, software deployment, and desktop environments to be managed from a single console.
| Setting Type | Applies To |
|---|---|
| Computer Configuration | Applies to the local computer and does not change per user. Includes Policies (cannot be changed by users — e.g. password policy, account lockout) and Preferences (can be changed by users — e.g. mapped drives, printers, shortcuts) |
| User Configuration | Applies to the user's account and follows them to any computer they log into, including new machines in the future |
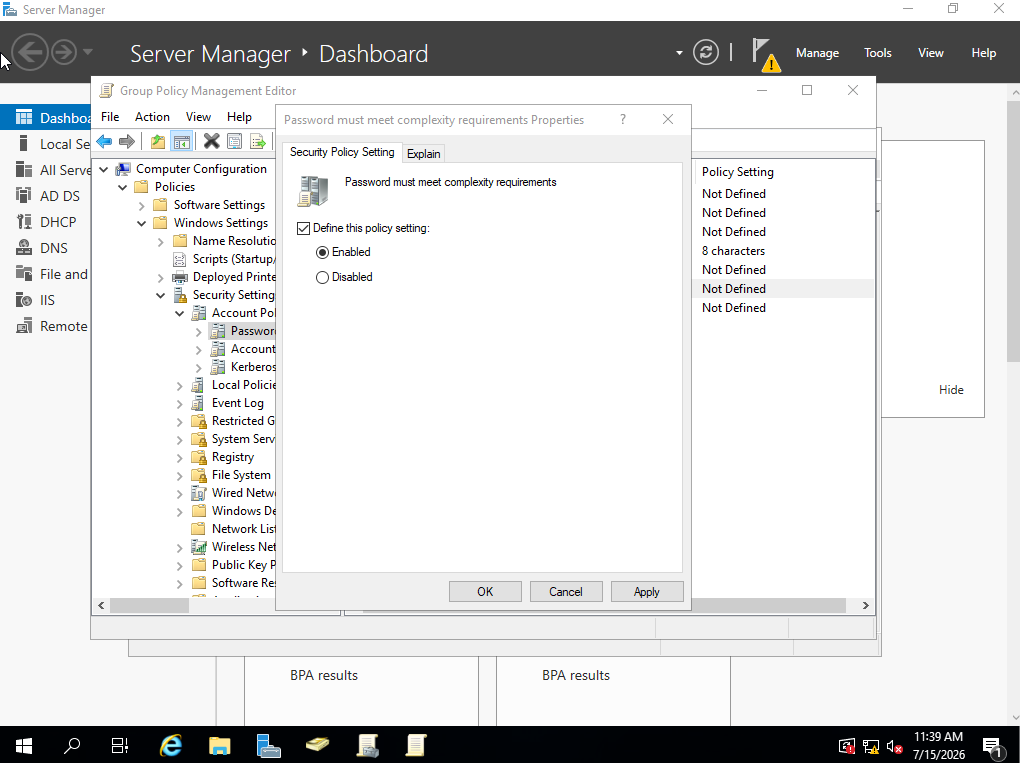
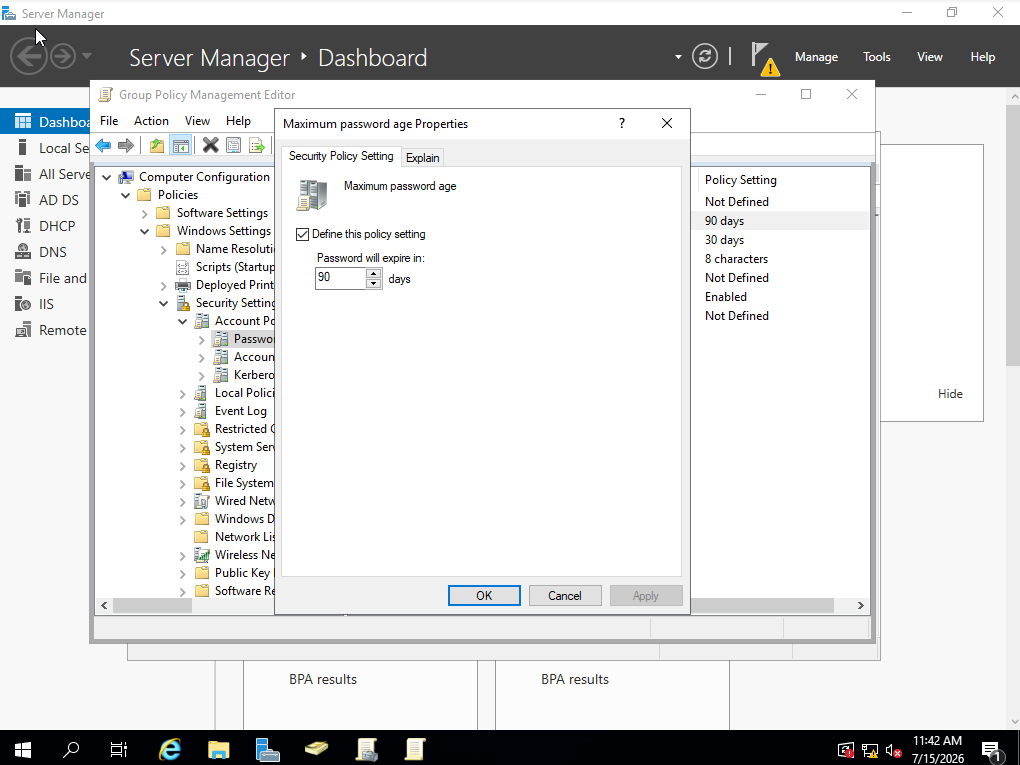
Password Policy
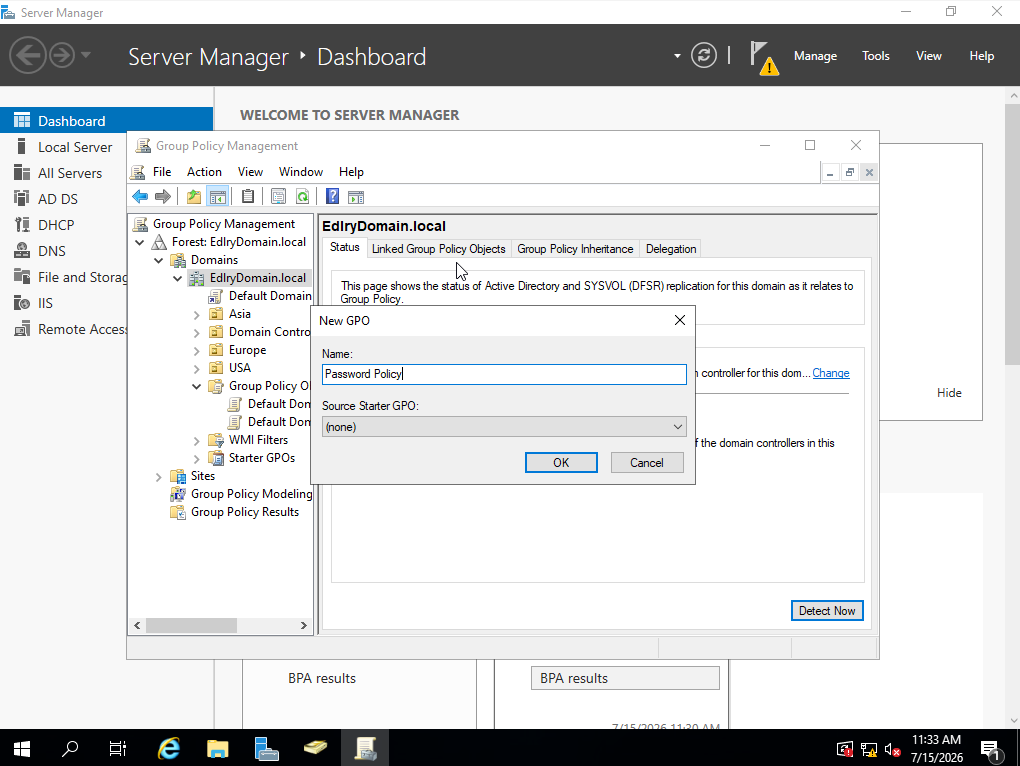
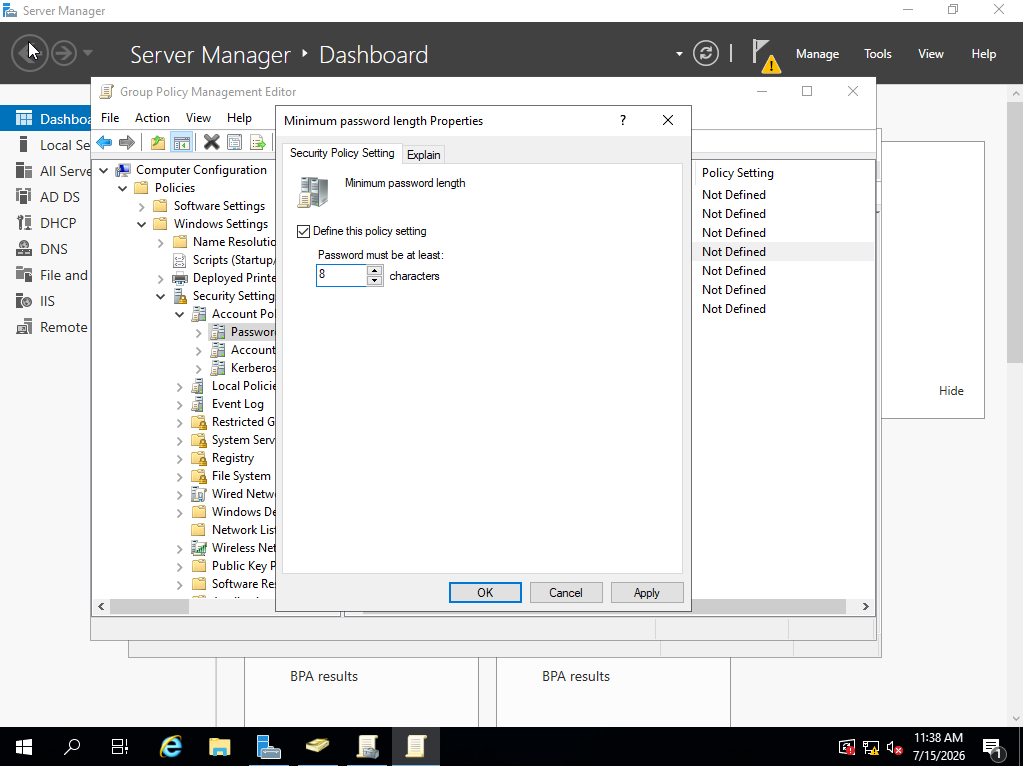
Configured a new GPO to enforce strong passwords and improve account security.
| Policy | Value |
|---|---|
| Minimum password length | 8 characters |
| Password complexity requirements | Enabled |
| Maximum password age | 90 days (quarterly) |
Drive Mapping
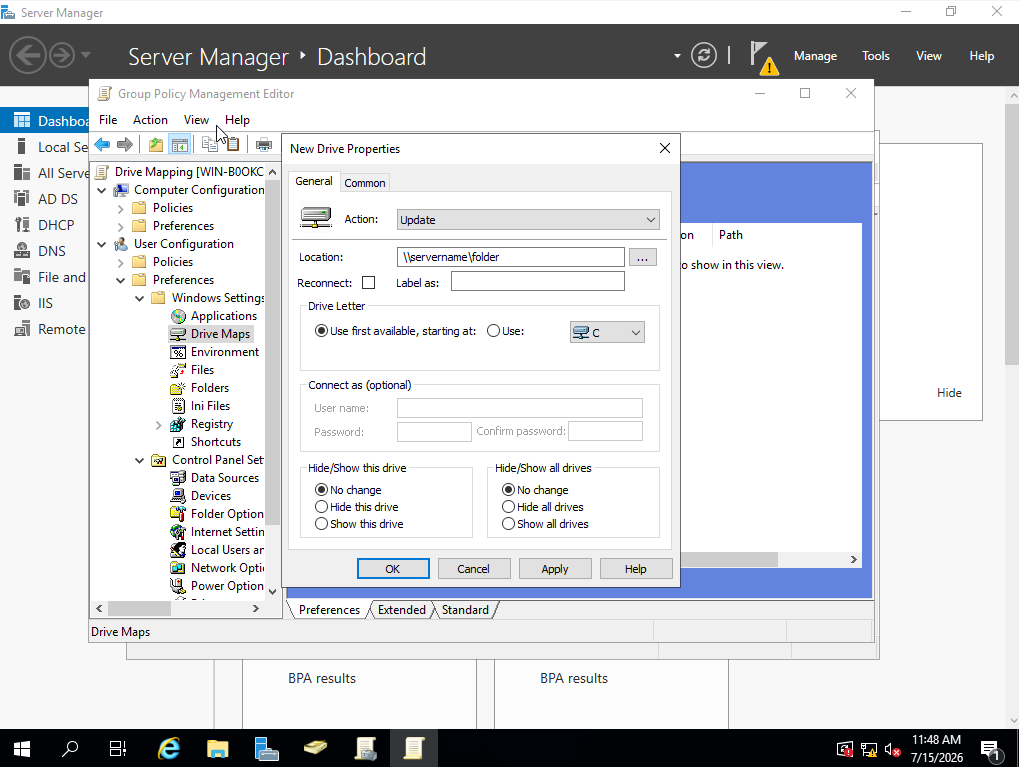
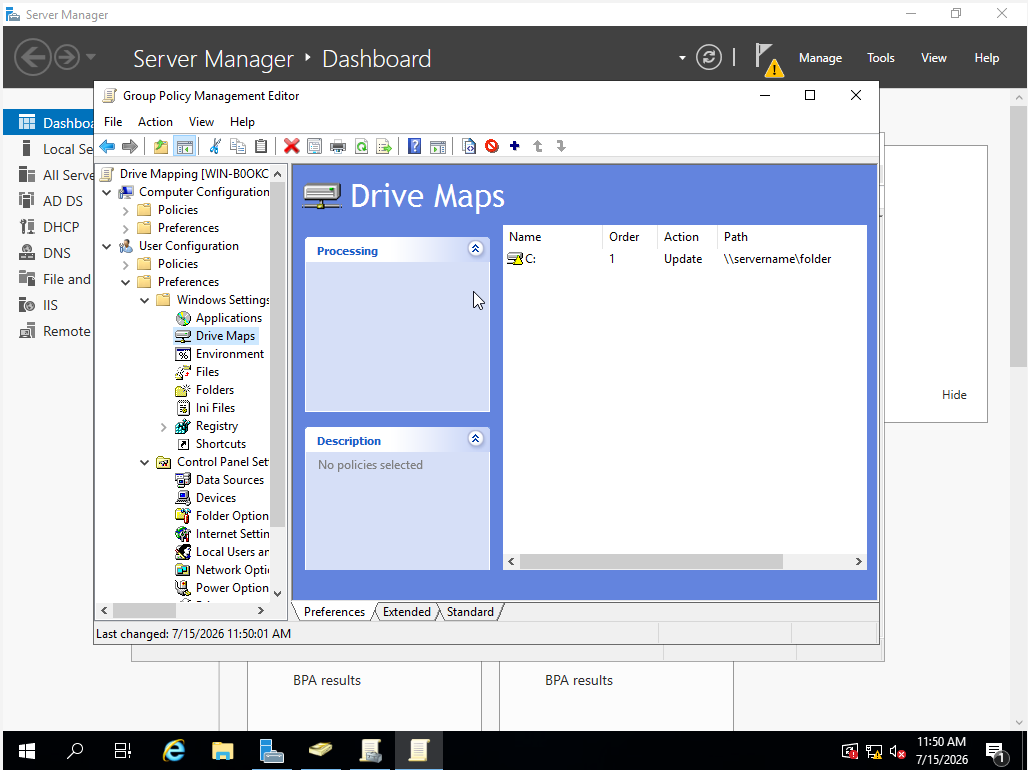
Configured a Group Policy Preference to automatically map a network drive for users — assigning a local drive letter to a remote network share so users can access centralized files as if they were local storage.
Additional Security Policies
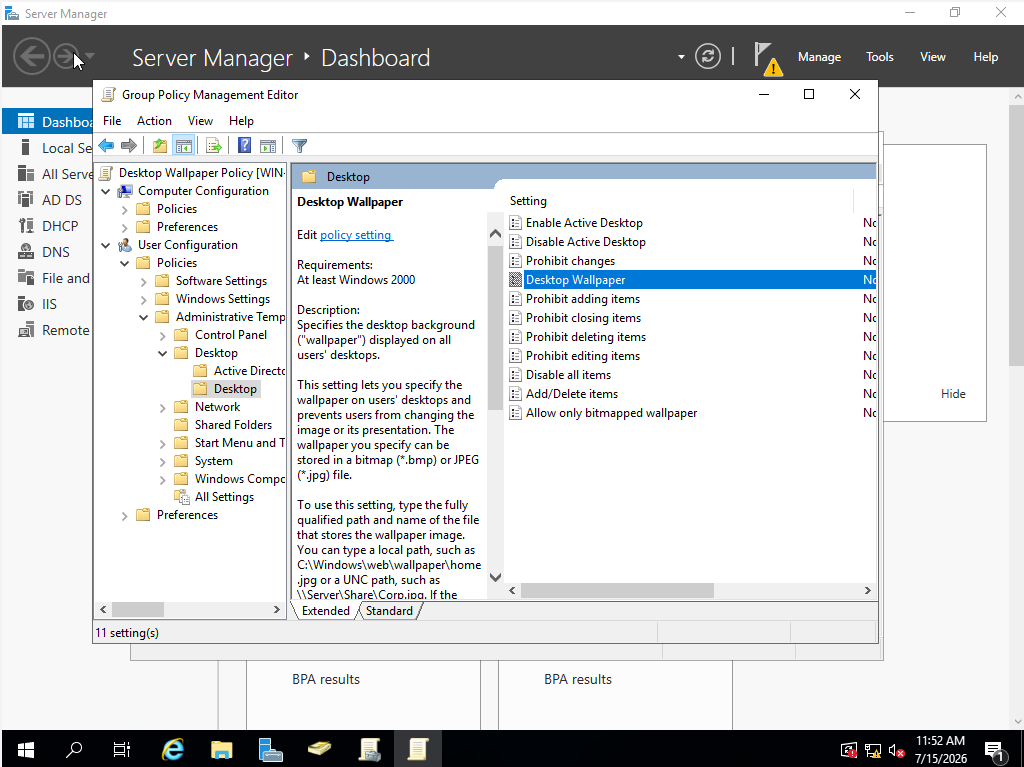
- Desktop Wallpaper Policy — set a default desktop wallpaper for all domain users
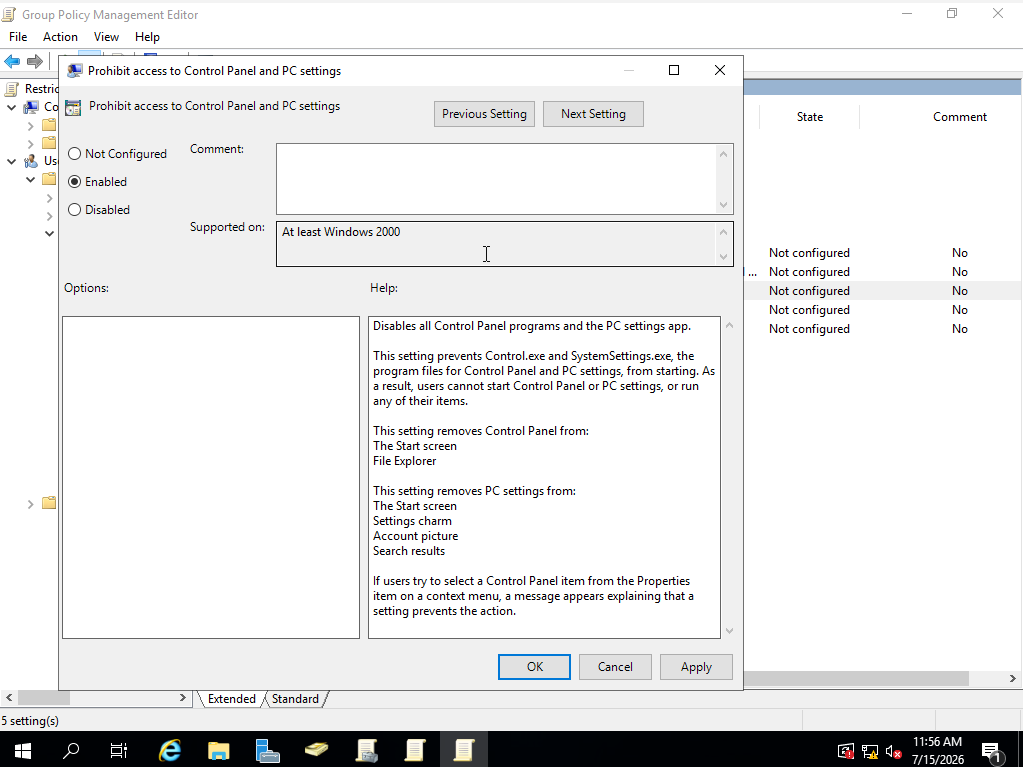
- Restrict Access to Control Panel — prevented users from accessing Control Panel and PC settings
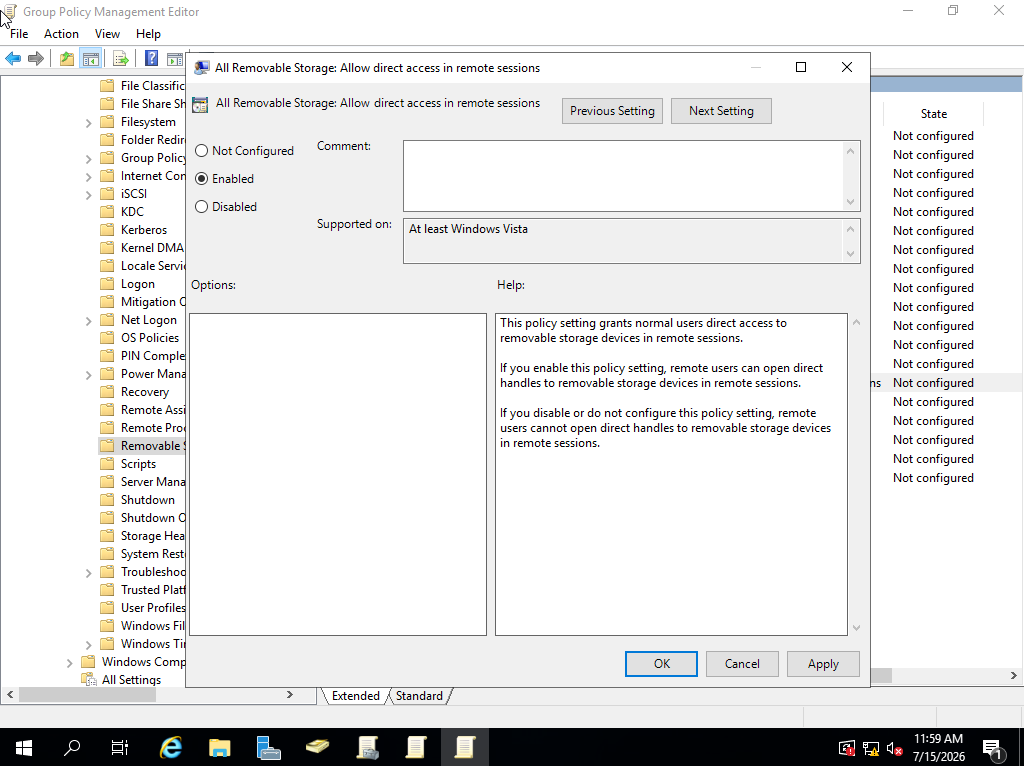
- Disable USB Storage — blocked users from using removable USB storage devices
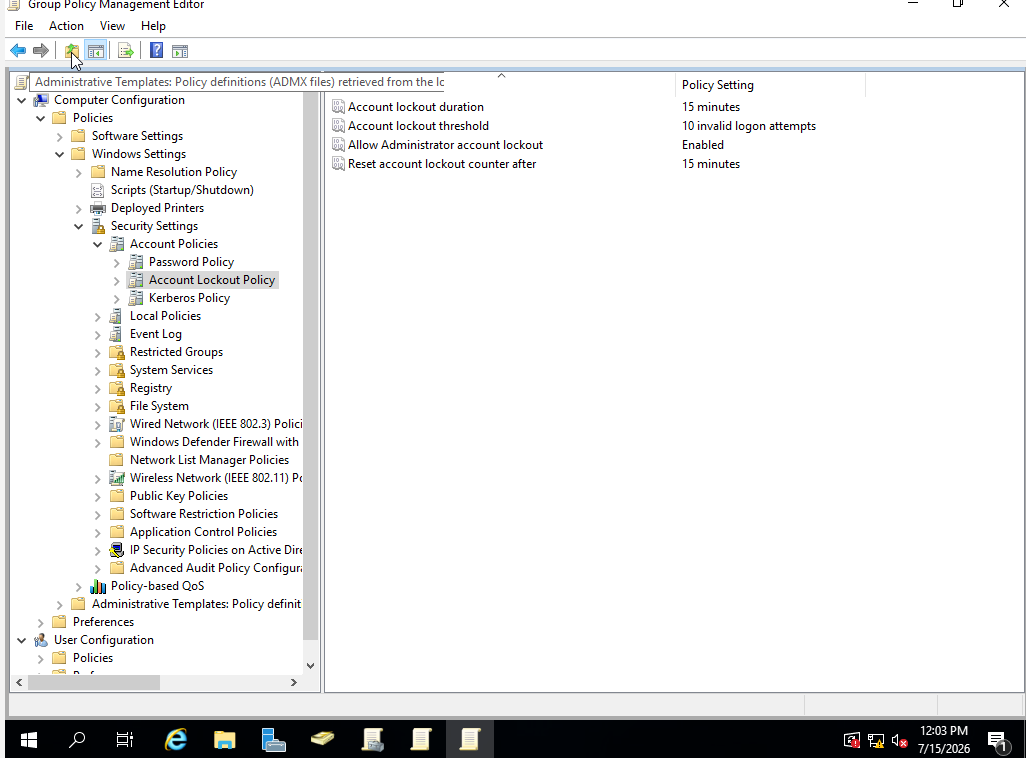
- Account Lockout Policy — configured lockout duration, threshold, and reset counter settings to prevent brute-force attacks
7Joining a Client Machine
Installed a Windows 10 virtual machine to act as a domain-joined client, allowing the Group Policies configured above to be tested against a real end-user workstation.
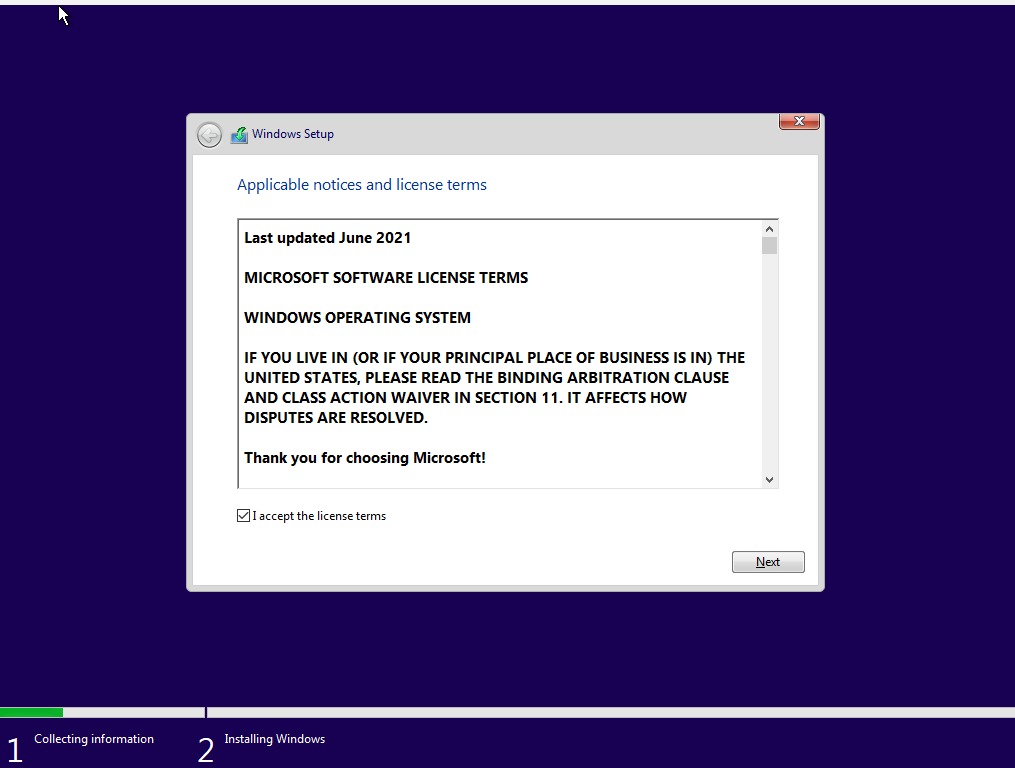
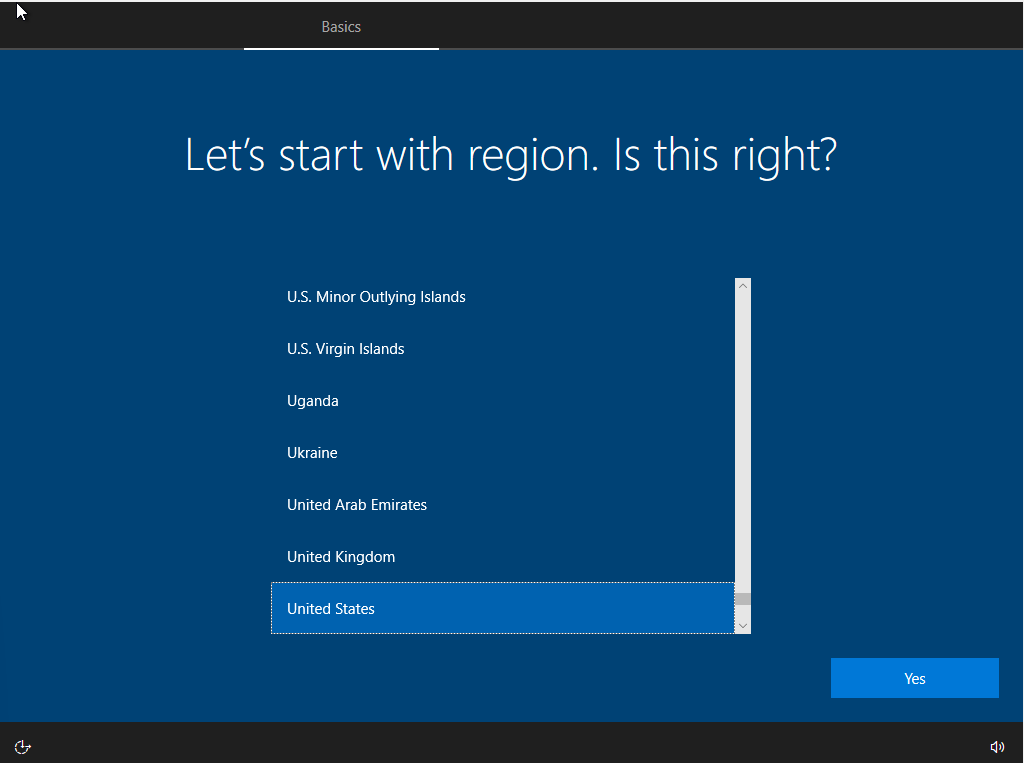
Windows Setup
Walked through the initial Windows 10 setup screens, including region and locale selection.
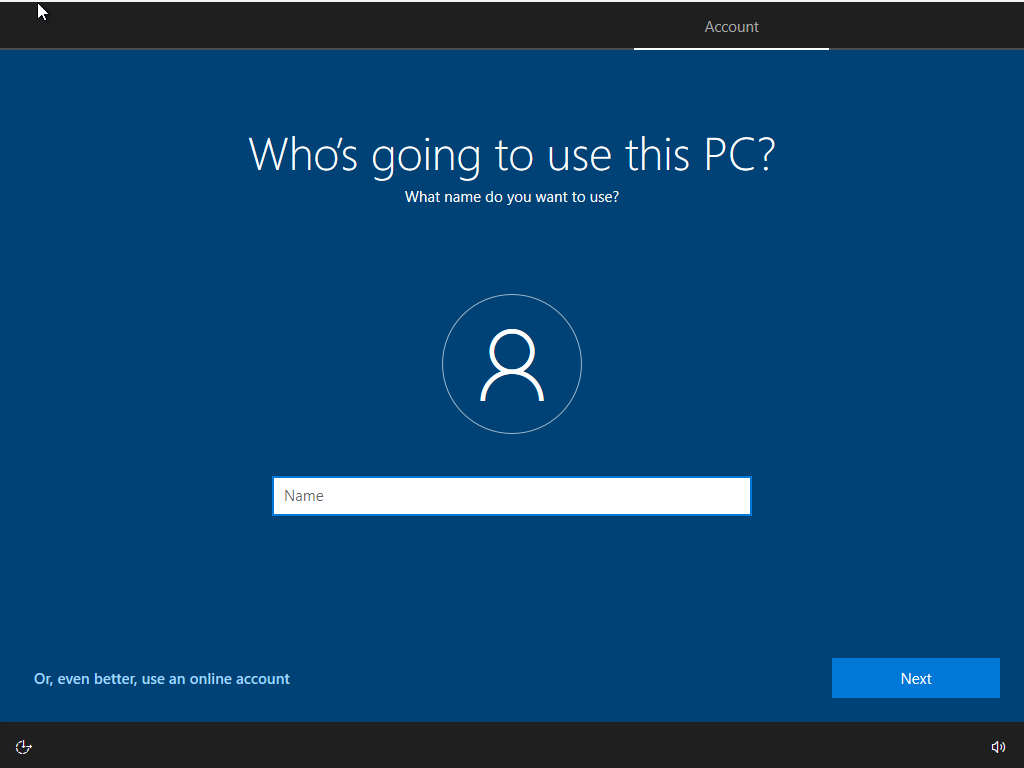
Local Account Setup
Created a local account on the client machine before joining it to the domain.
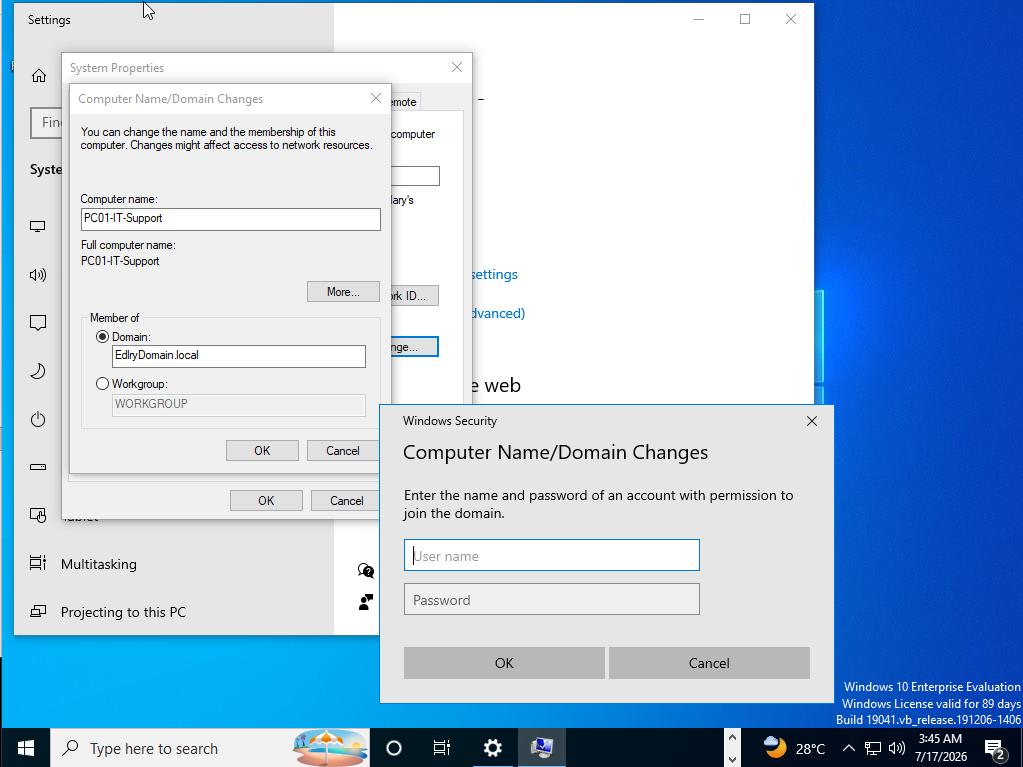
Joining the Domain
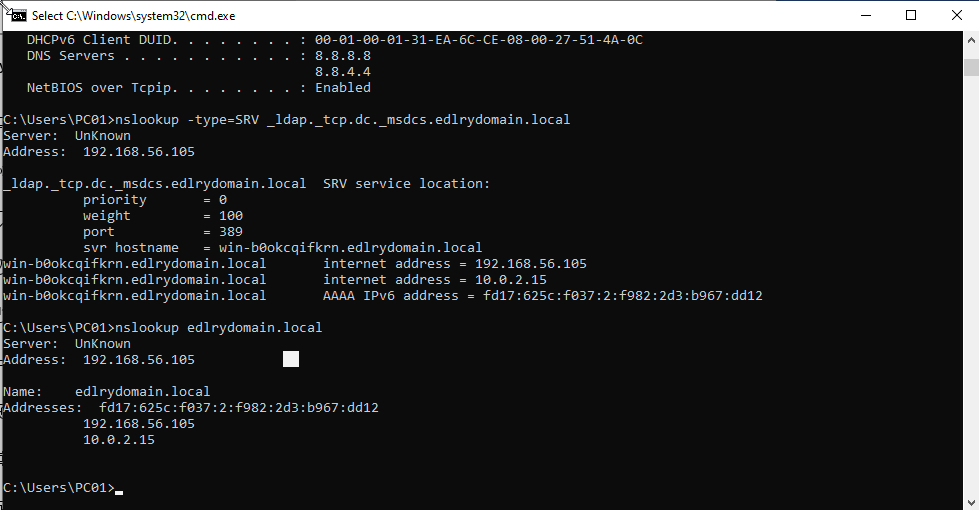
Before joining the domain, configured the IP address on both the server and the client, and pointed the client's DNS server setting to the domain controller so PC01-IT-Support could locate and authenticate against the domain.
Troubleshooting — Verifying Domain Communication
Used nslookup to confirm the client could resolve and communicate with the domain controller before attempting to join.
Successful Domain Join
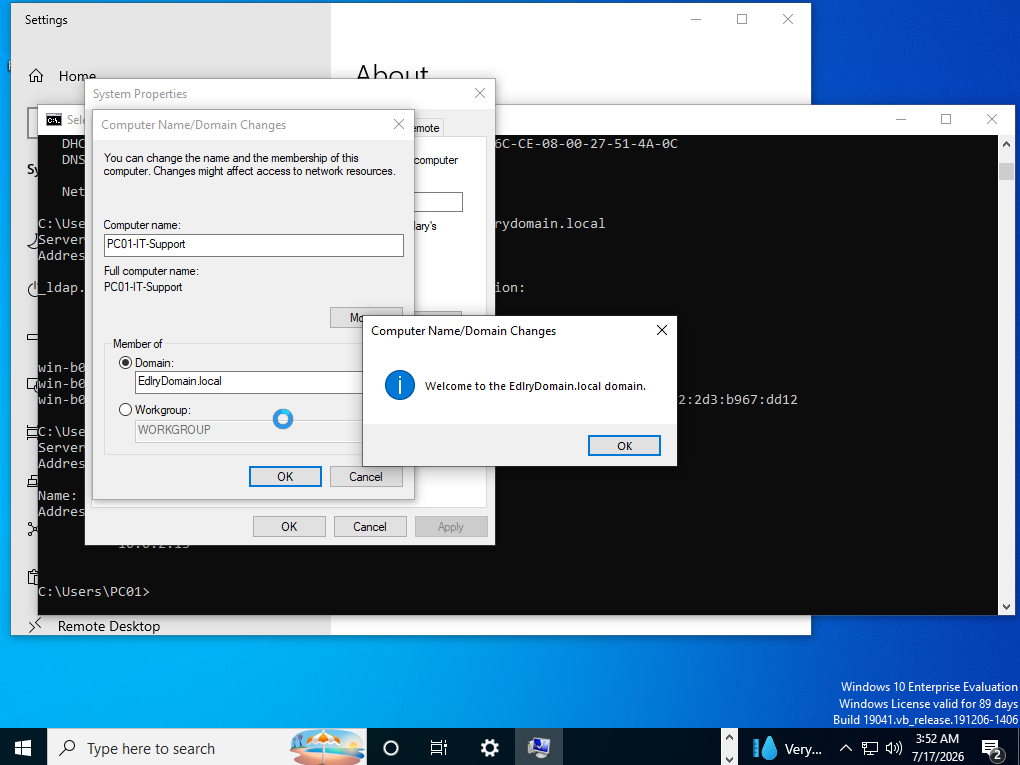
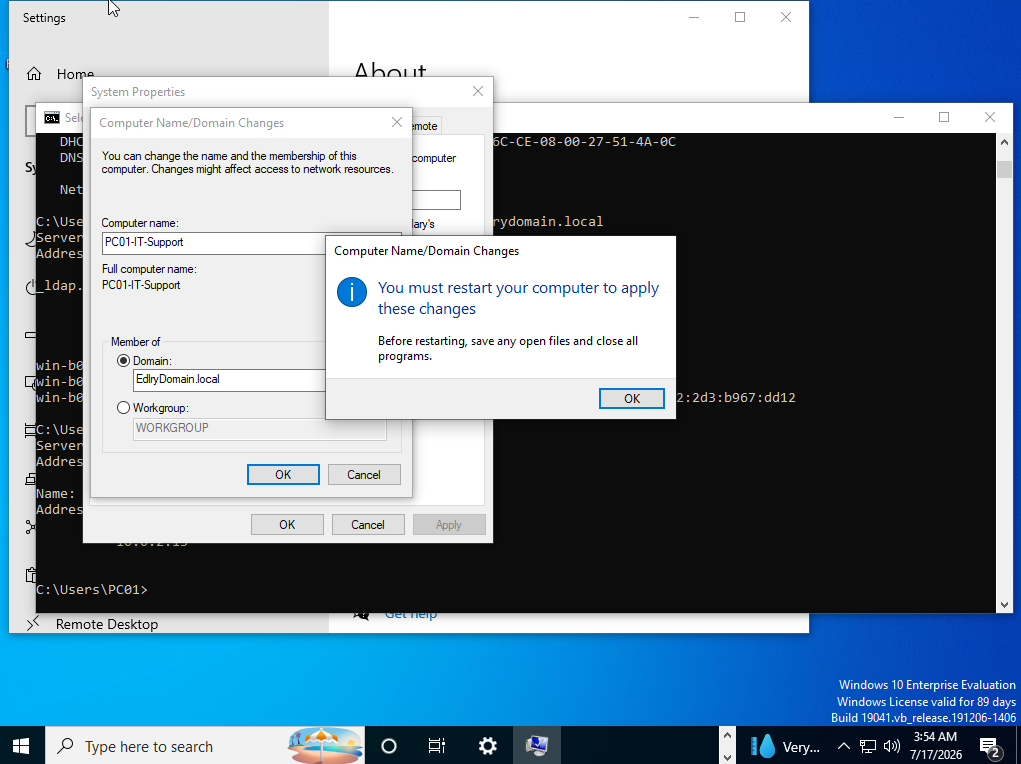
PC01-IT-Support successfully joined the EdlryDomain.local domain and the machine was restarted to apply the changes.
Signing In With the Domain User
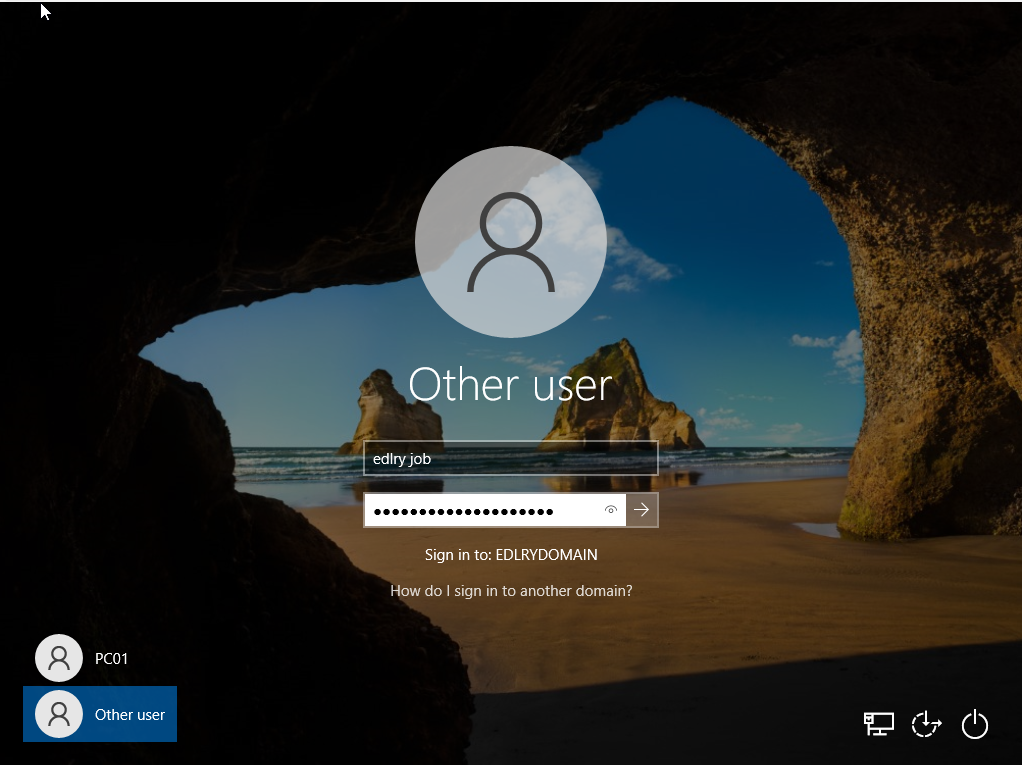
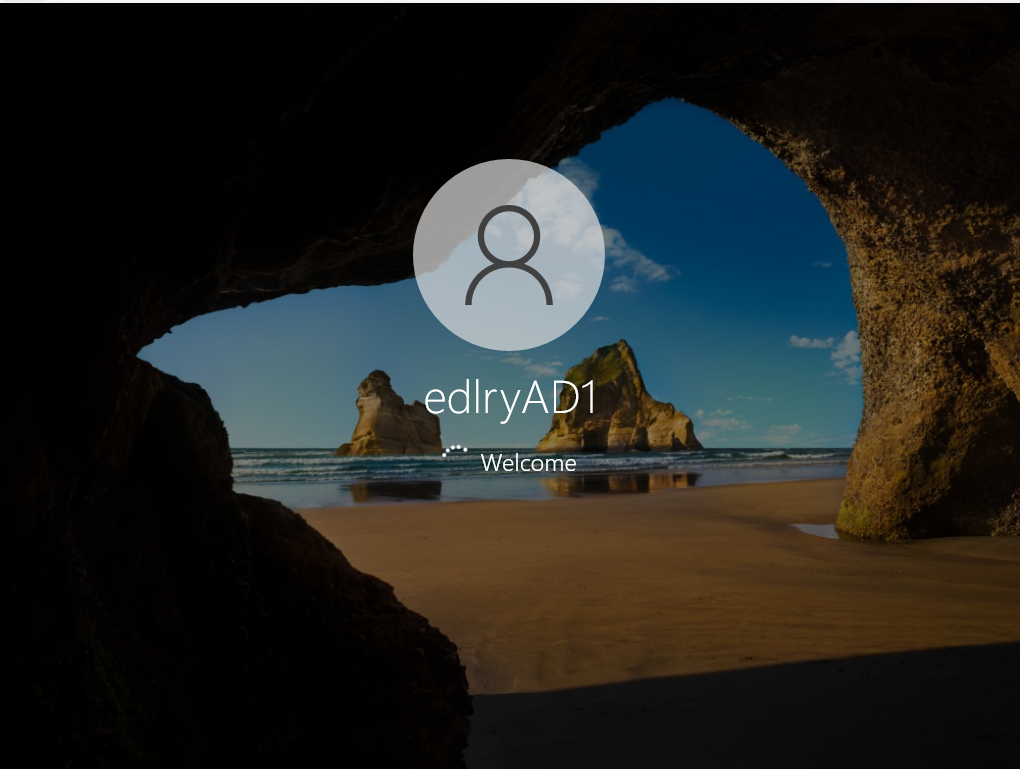
Signed in to the joined machine using the domain account, confirming the login worked against the EDLRYDOMAIN directory.
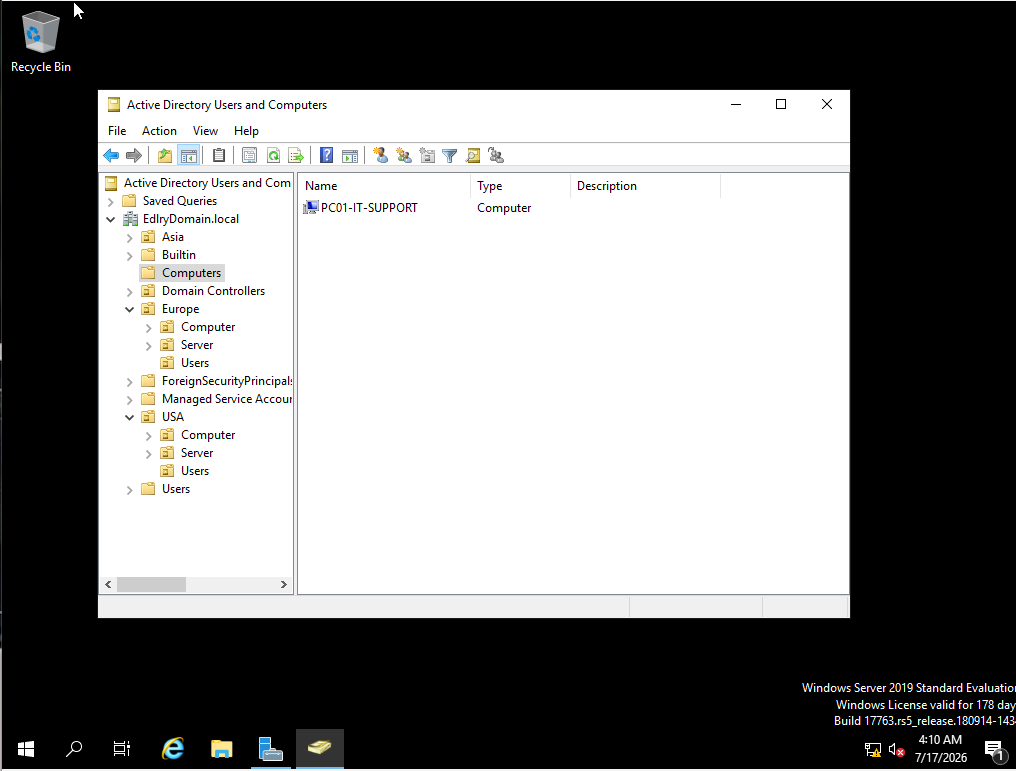
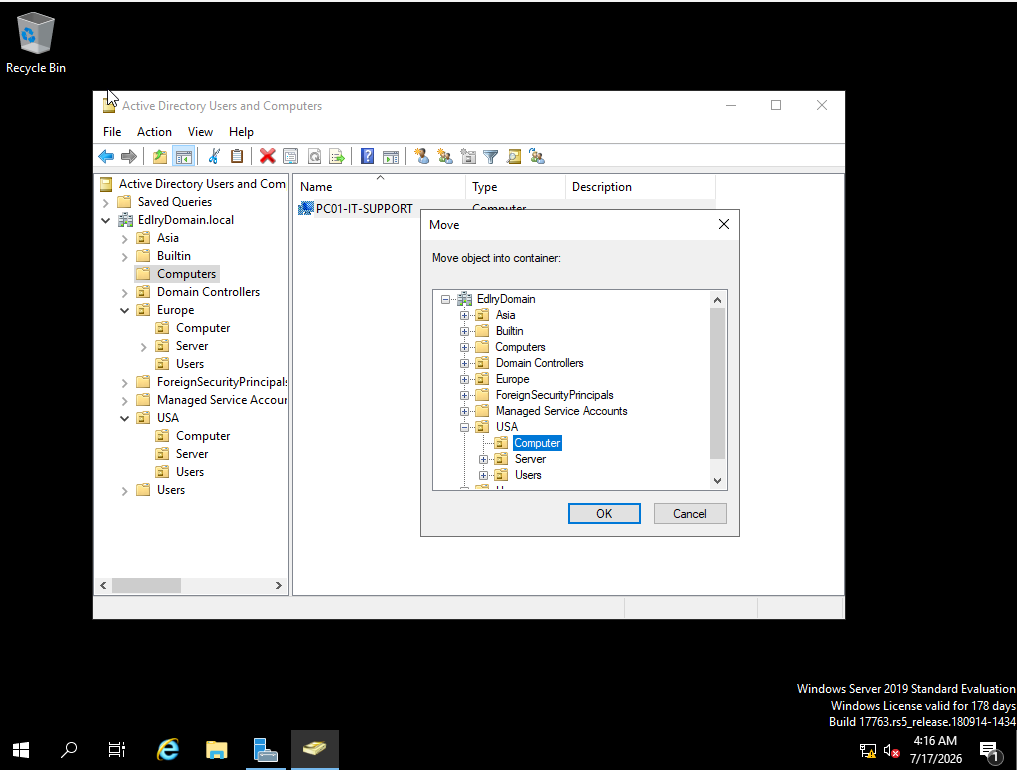
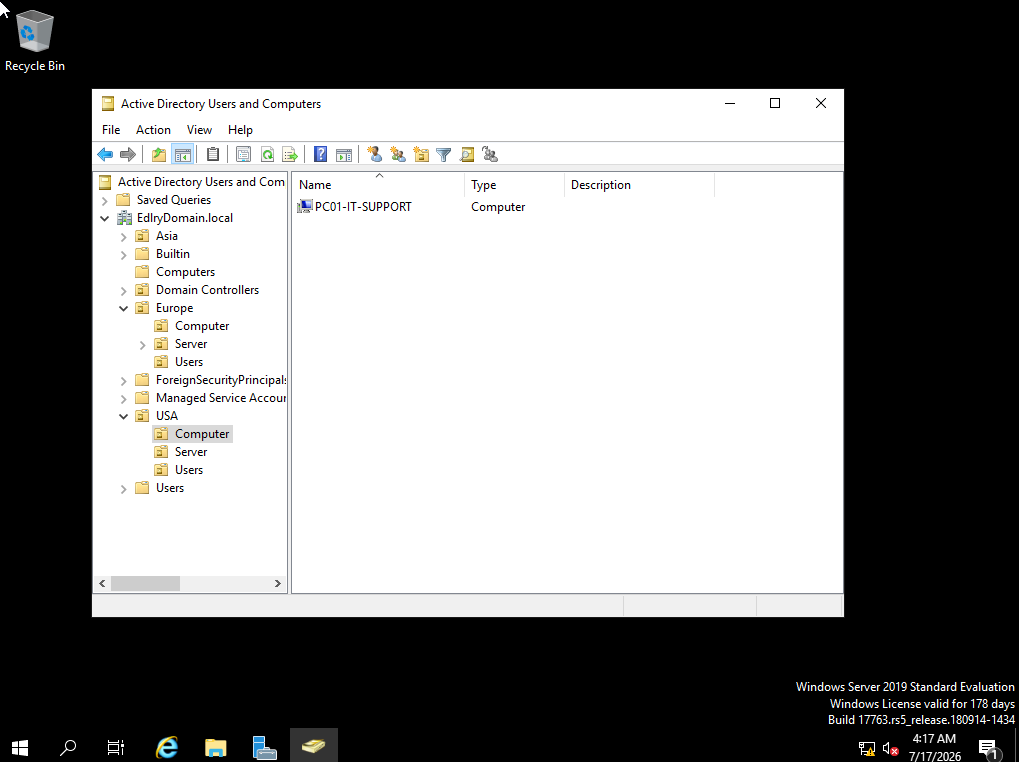
Confirming and Organizing the Computer Object
Verified in Active Directory Users and Computers that PC01-IT-SUPPORT now appeared as a joined computer object, then moved it out of the default Computers container and into the correct USA / Computer Organizational Unit to match the OU structure built earlier.
File Services, Group Policy Drive Mapping & FSRM
A follow-up session on the same lab, covering file sharing, automated drive mapping through Group Policy, and File Server Resource Manager (FSRM) for quotas and file screening.
8File Services
Set up file sharing within the Active Directory environment.
| Permissions and Access Control | |||
|---|---|---|---|
| Read | Write | Execute | Full Control |
| Types of Permissions | |
|---|---|
| NTFS | Share |
| Sharing Methods | |
|---|---|
| Network | Mapped |
9Set Up a File Sharing
- Create shared folders with appropriate permissions
- Set NTFS and share permissions to allow domain users access
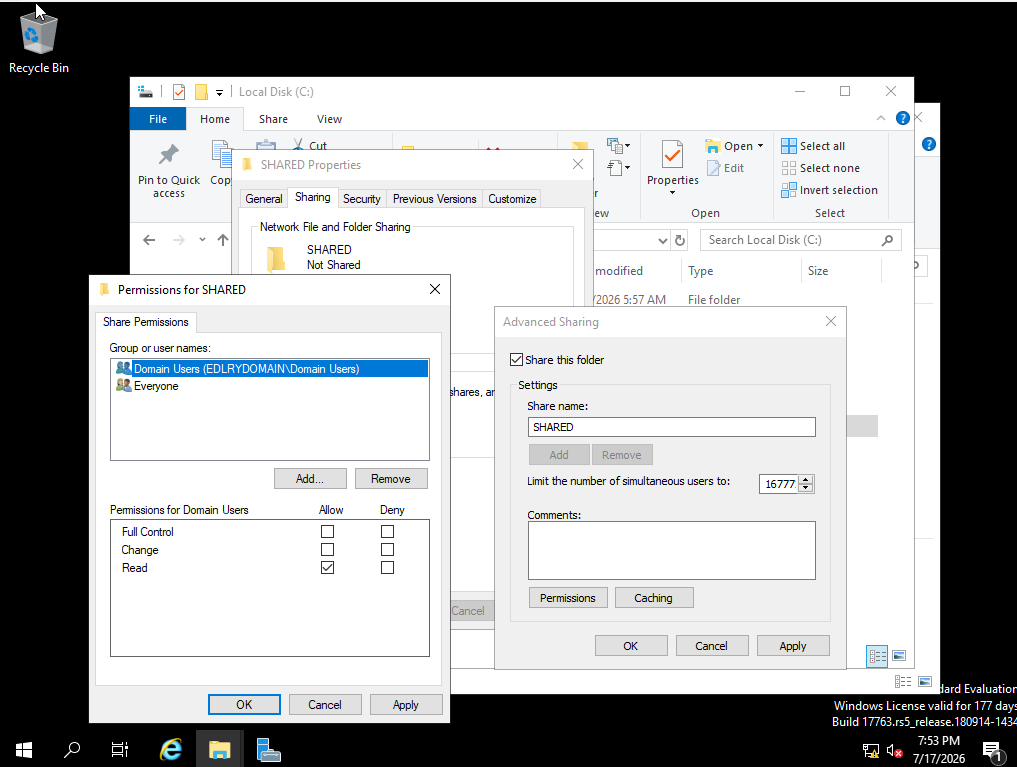
Created a folder on the Local Disk (C:) named SHARED.
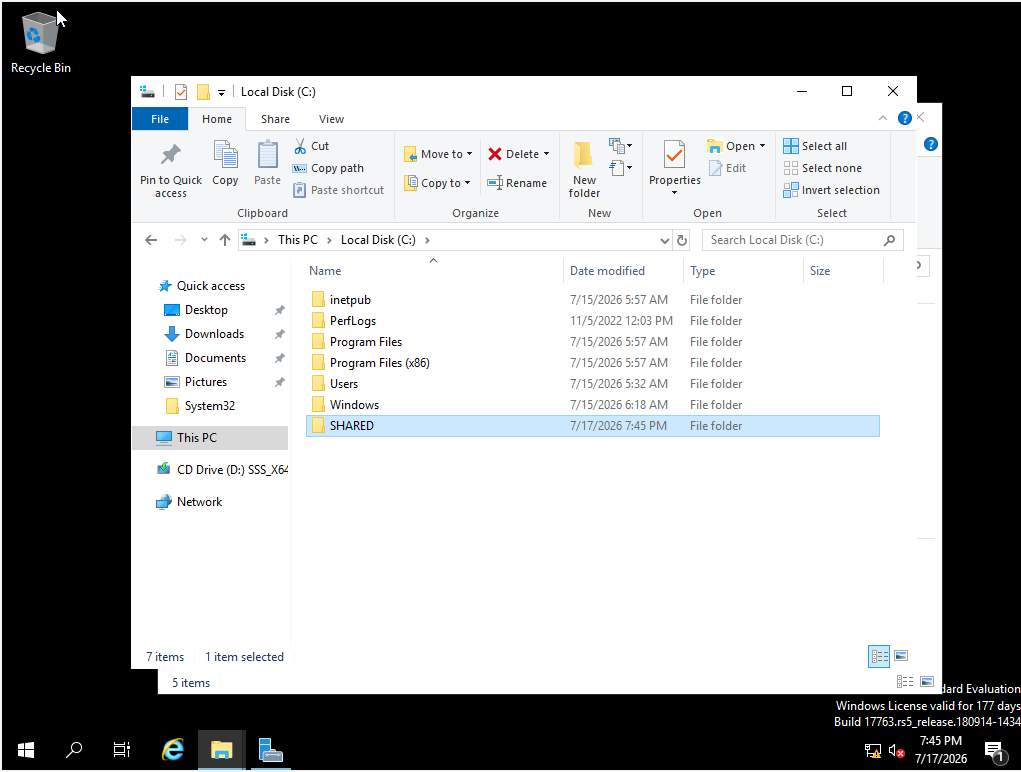
Opened the properties of the SHARED folder, enabled Share this Folder, clicked Add, typed domain in the object name field, then clicked Check Names.
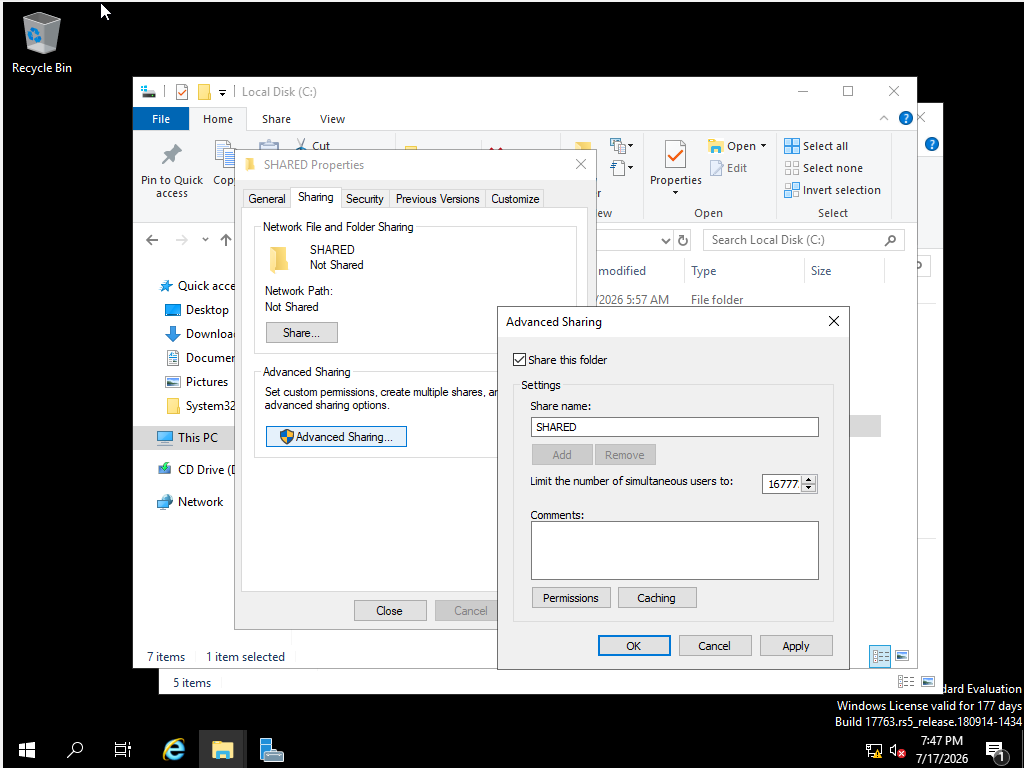
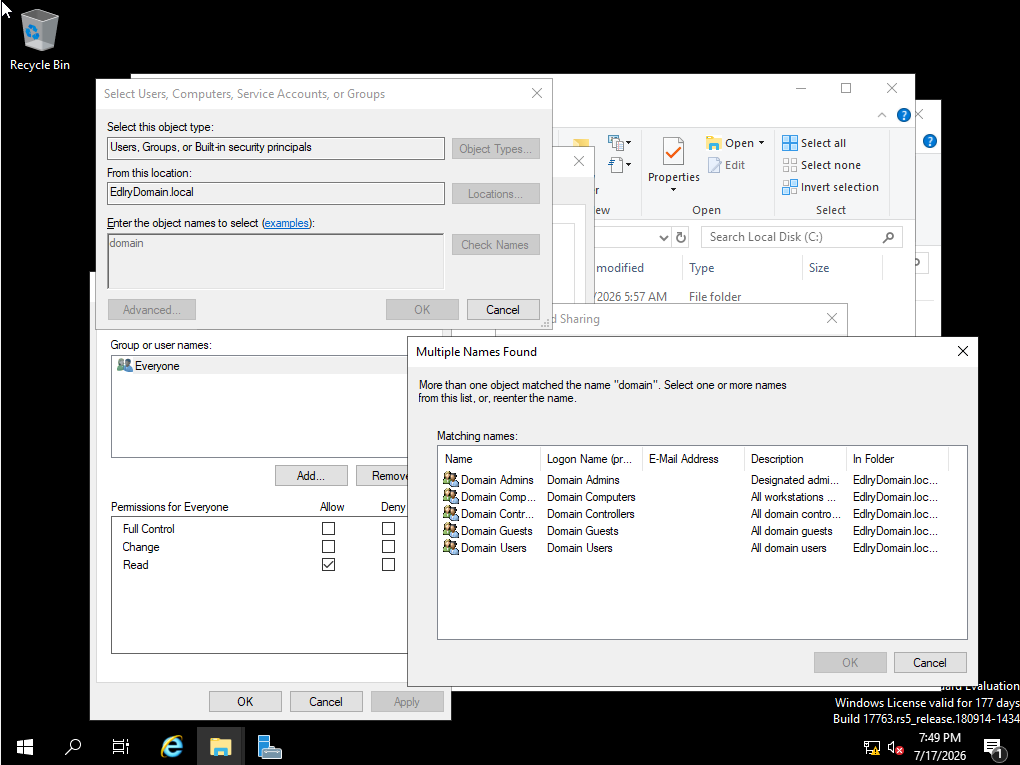
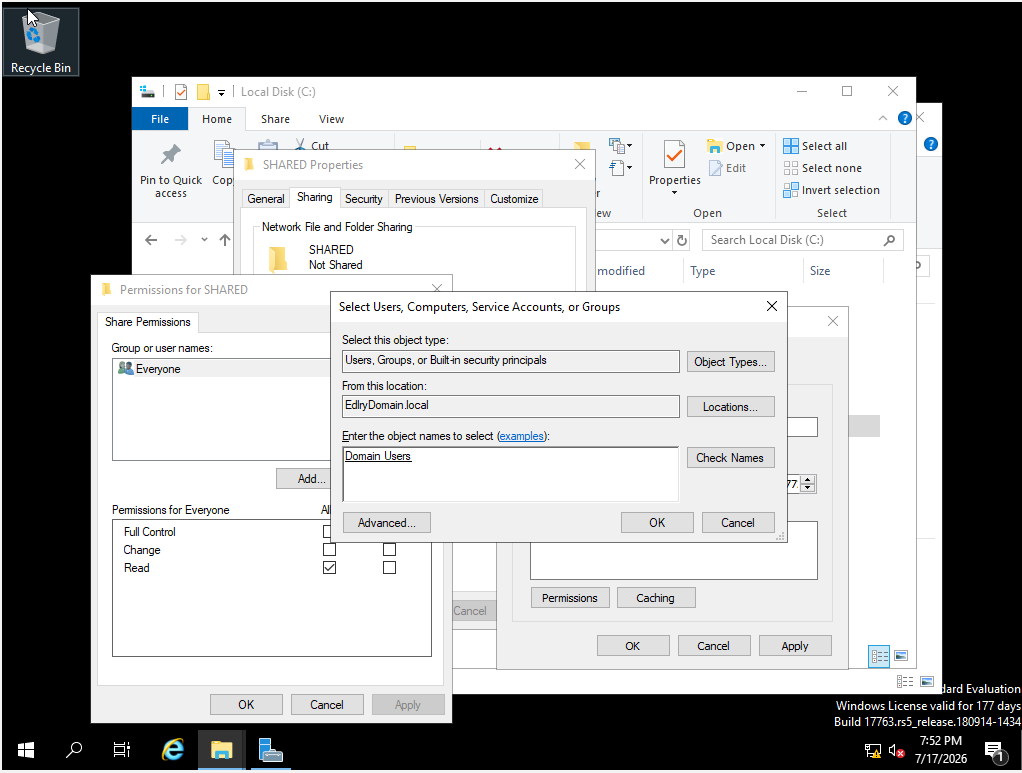
Selected Domain Users from the matching names list, and for share permissions, selected Read only.
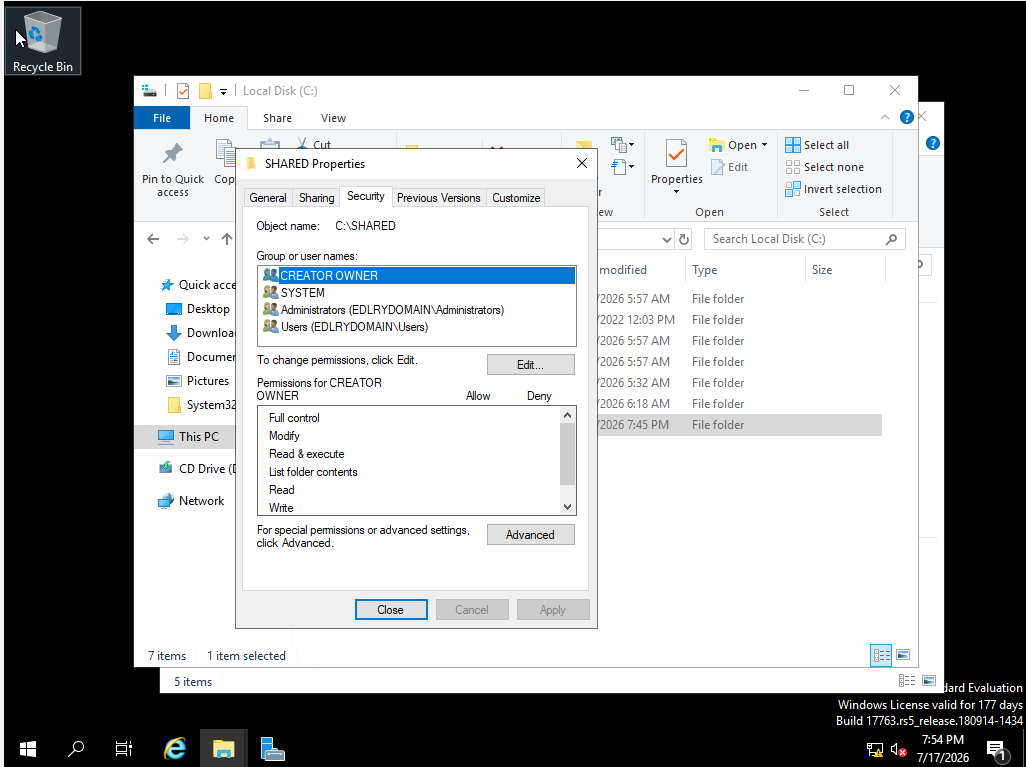
Configured matching NTFS permissions on the Security tab for the SHARED folder.
10Mapping the Shared Drive on Client Machines
- Log in to the client machines using domain user accounts
- Map network drives to access shared folders
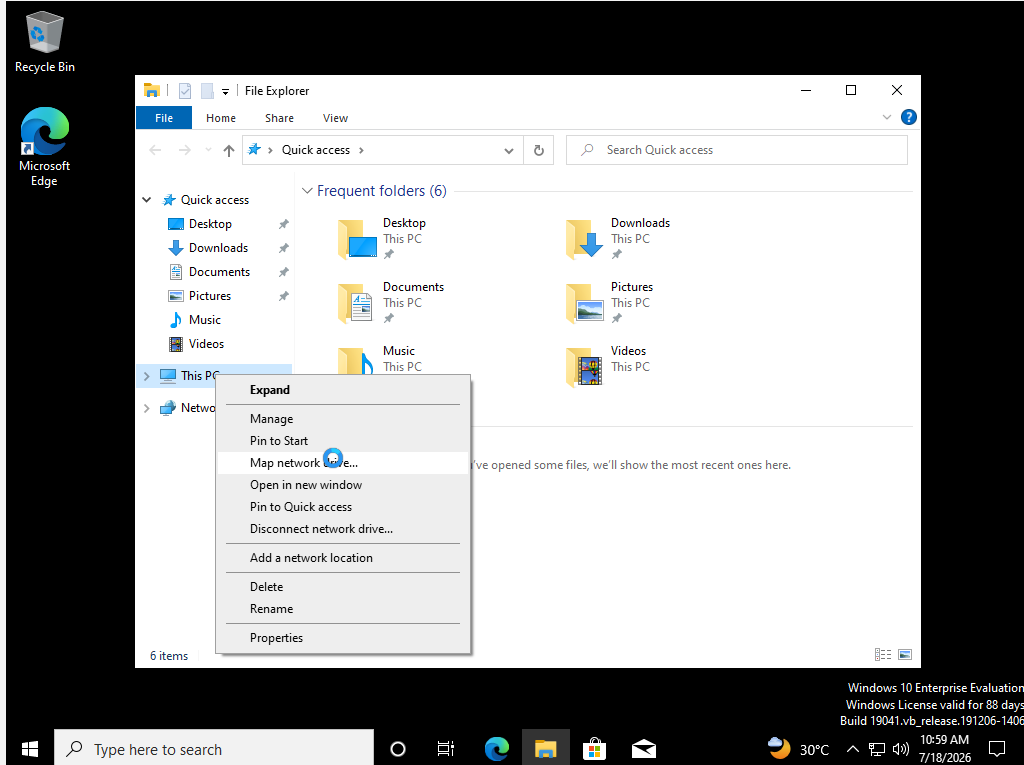
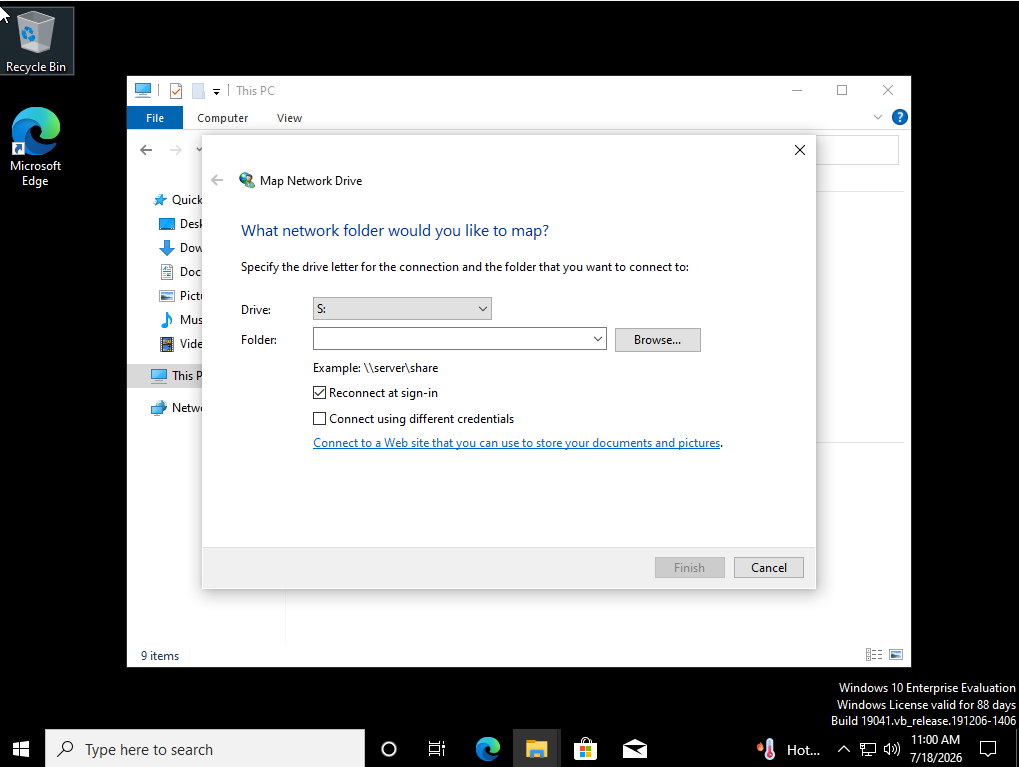
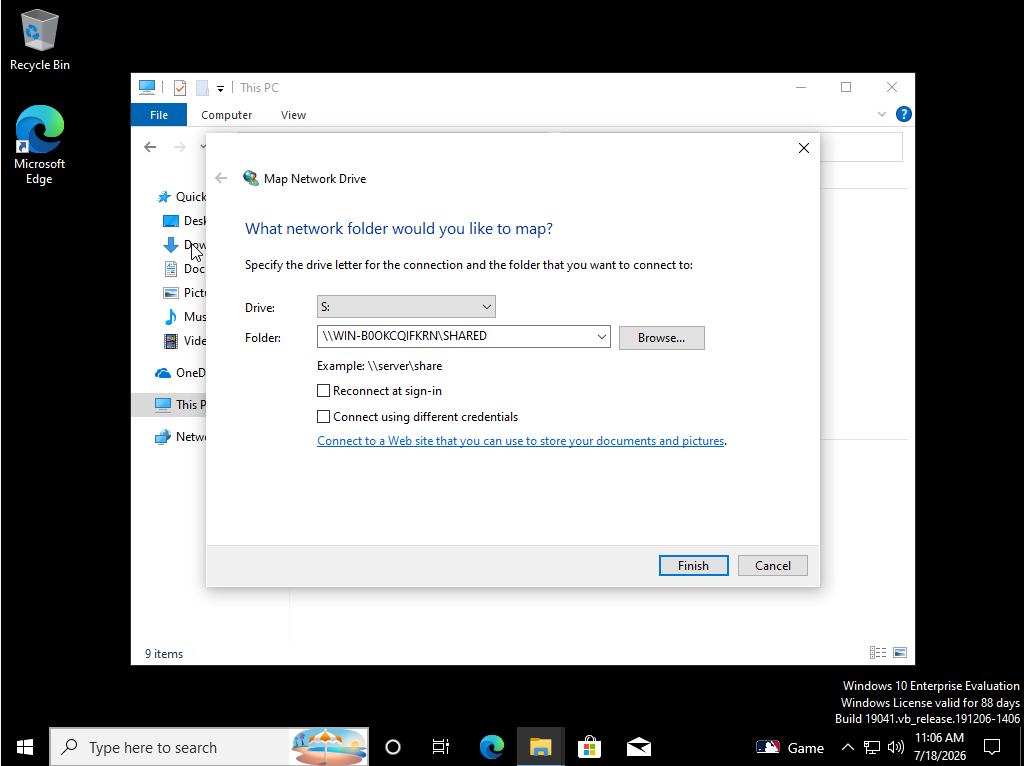
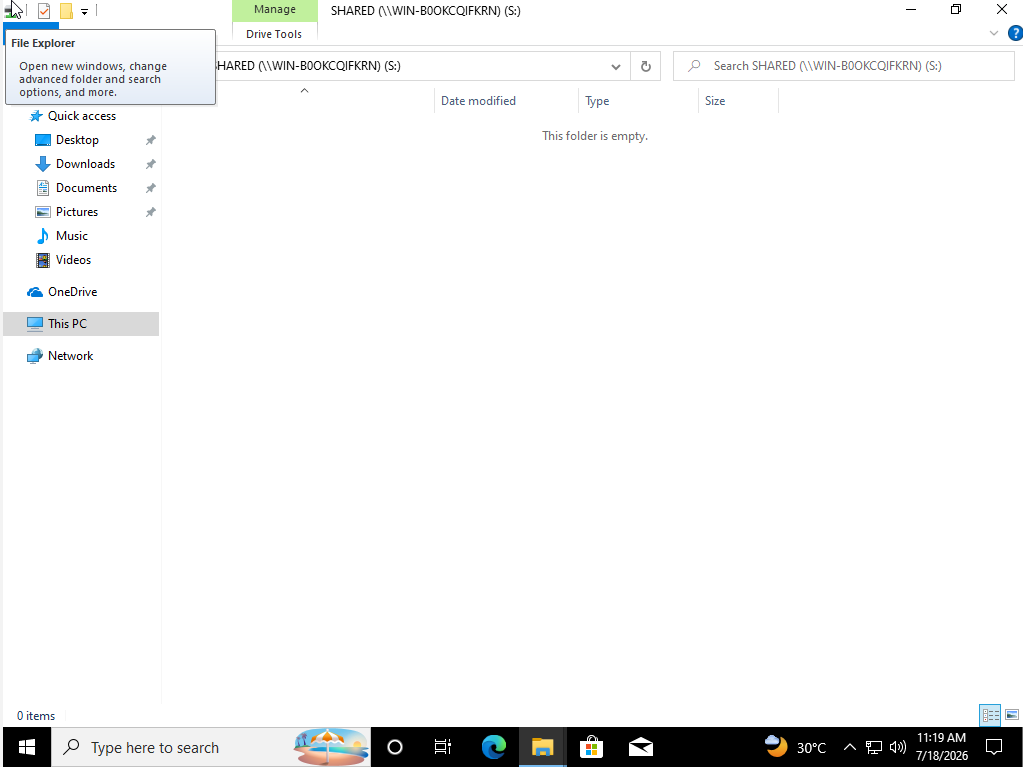
Right-clicked This PC → Map network drive. Ran hostname on the server terminal, which returned WIN-B0OKCQIFKRN, then mapped the folder to \\WIN-B0OKCQIFKRN\SHARED. Unchecked Reconnect at sign-in and finished.
11Automating the Drive Map with Group Policy
Configured a Group Policy Object so the SHARED drive maps automatically for users, instead of relying on each client mapping it manually.
Created a GPO for mapped drives on the Windows Server and pointed it to the server's shared path.
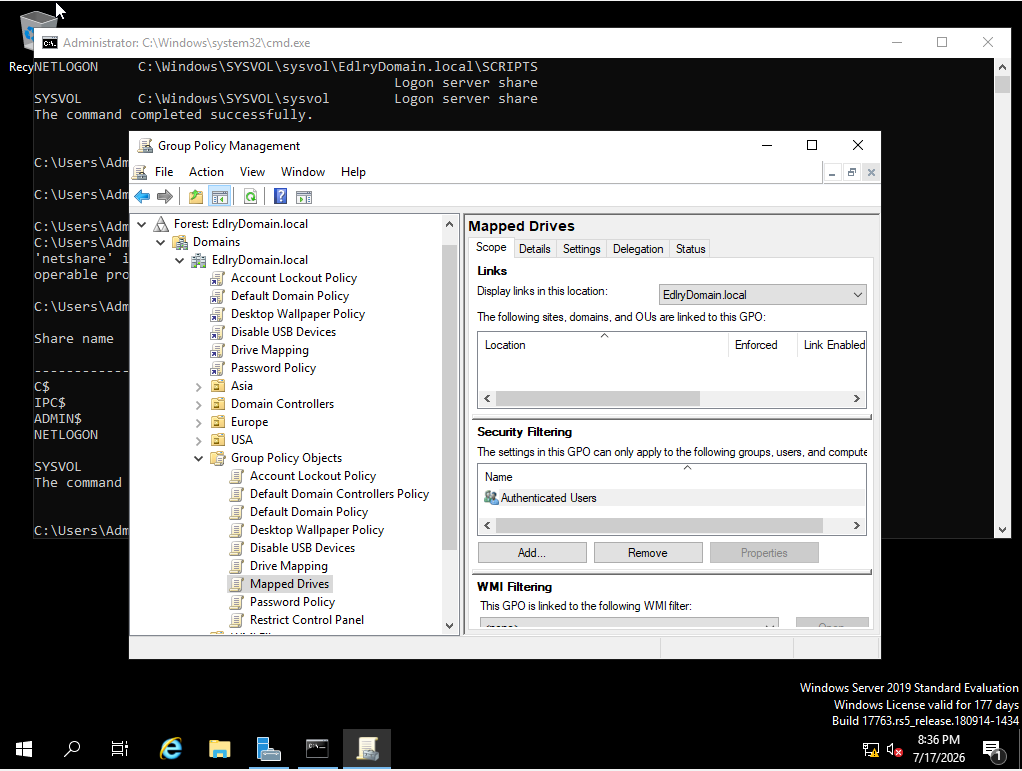
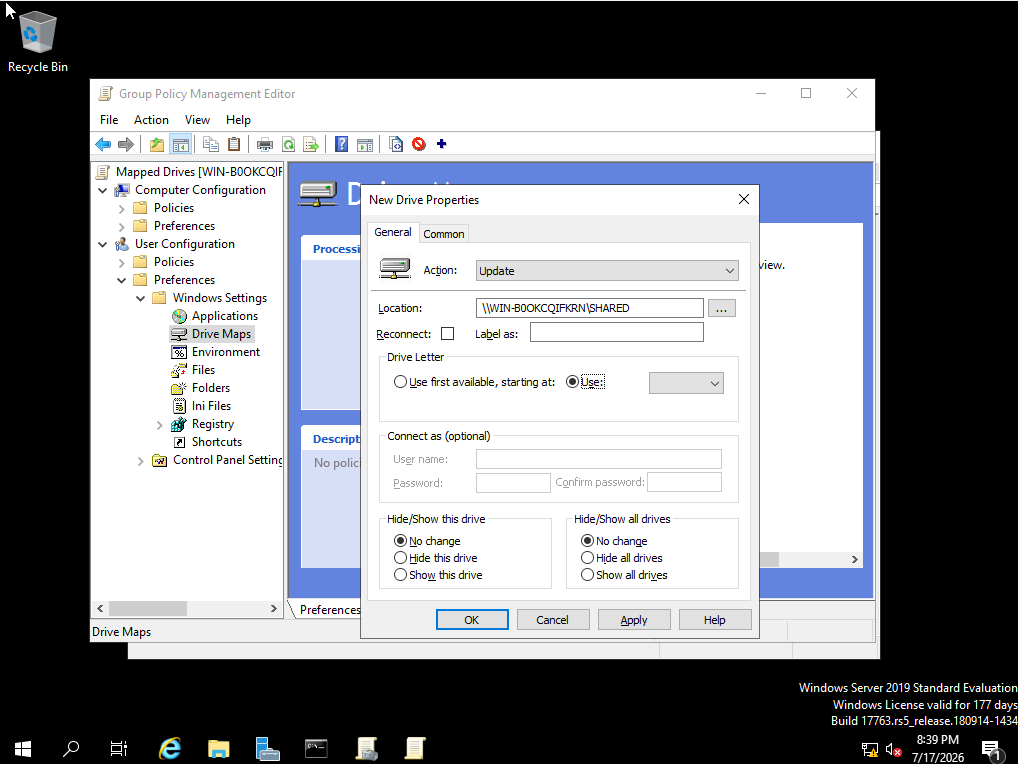
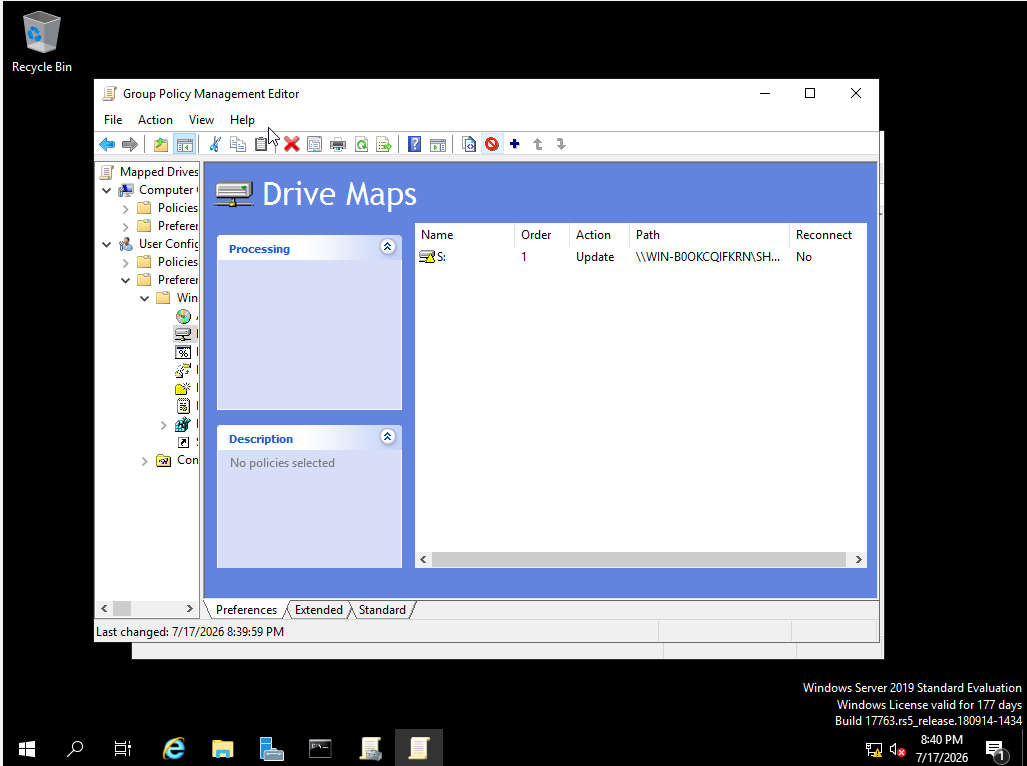
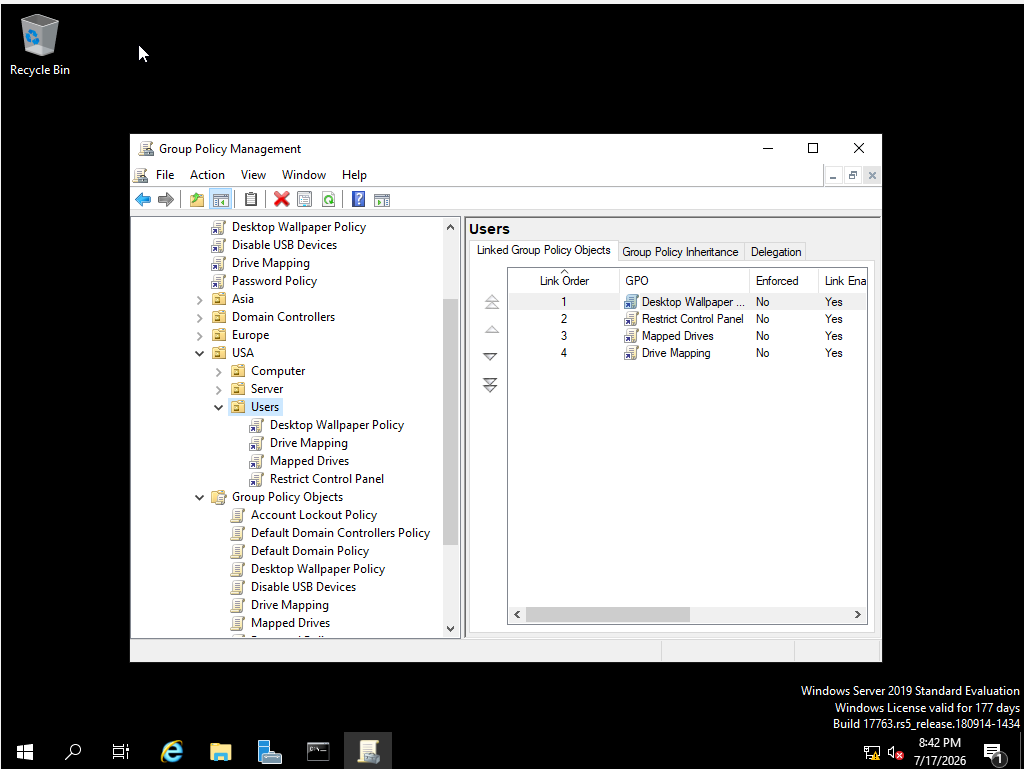
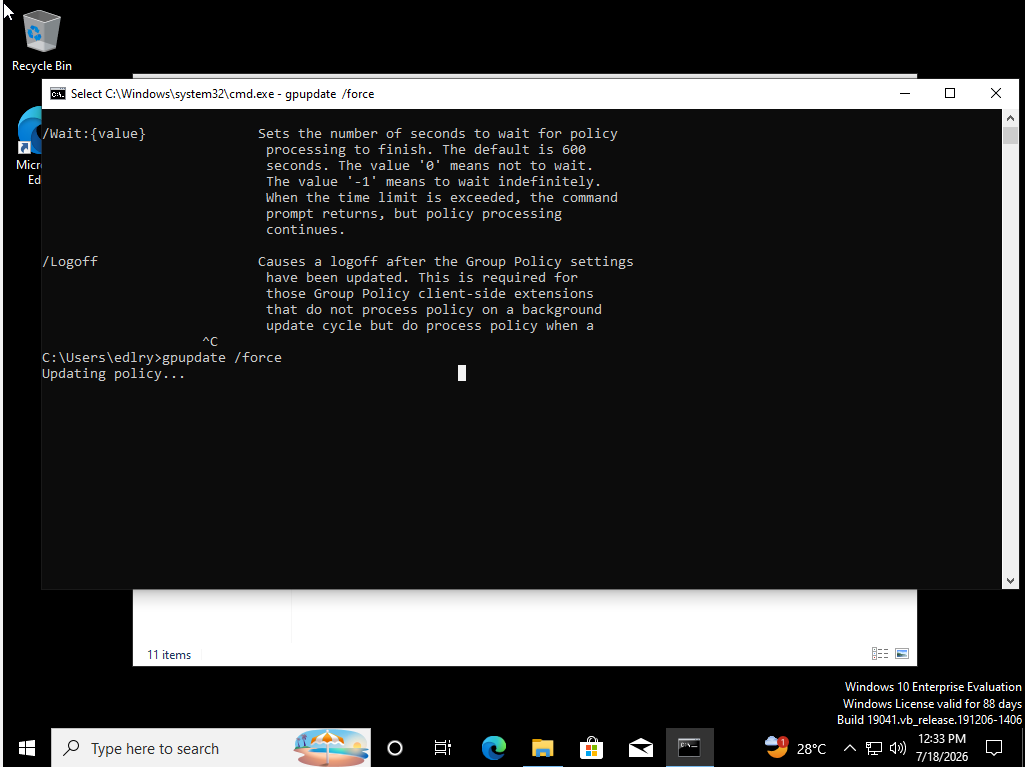
Applied the drive mapping GPO to the USA Users OU, then tested it with gpupdate /force and restarted the client PC to confirm the drive mapped automatically.
12File Server Resource Manager (FSRM)
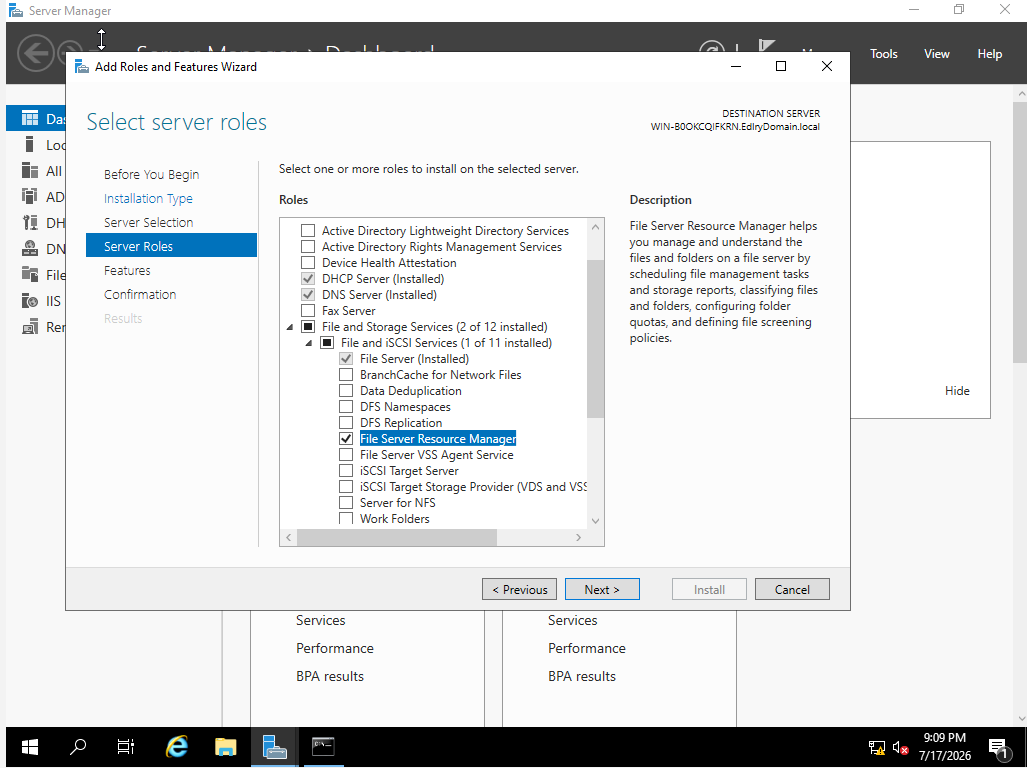
Implemented quotas and file screening using FSRM — configuring a Quota Template and a File Screen Template to manage file storage across the organization.
Installed the File Server Resource Manager role via the Add Roles and Features Wizard.
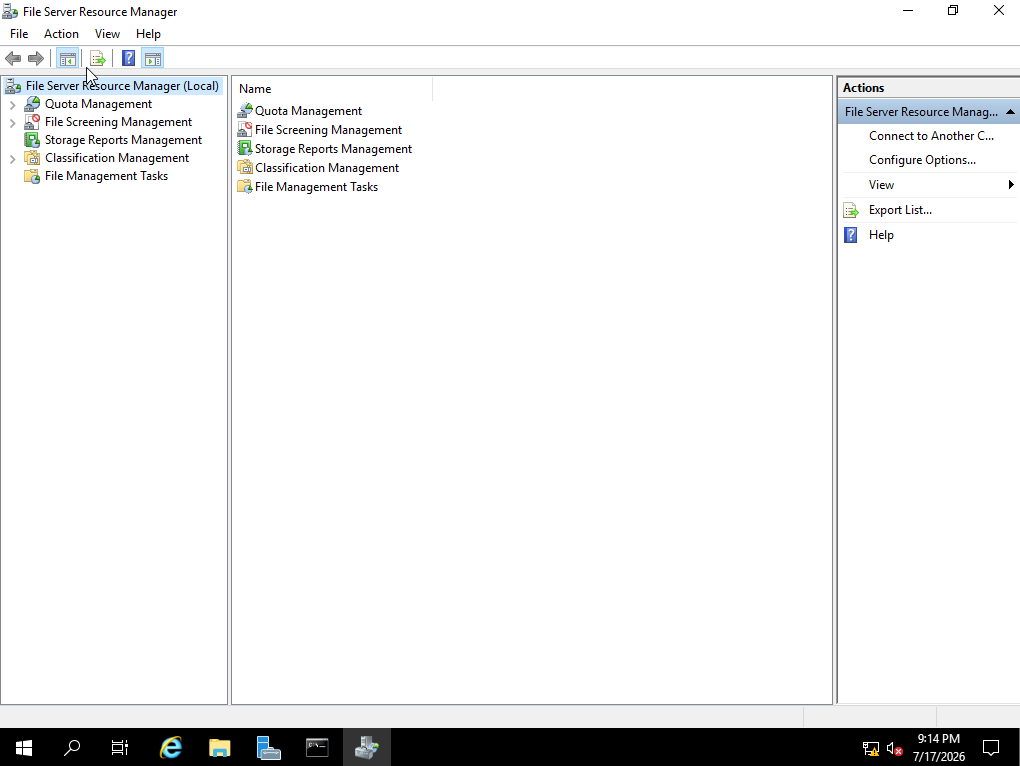
Quota Management
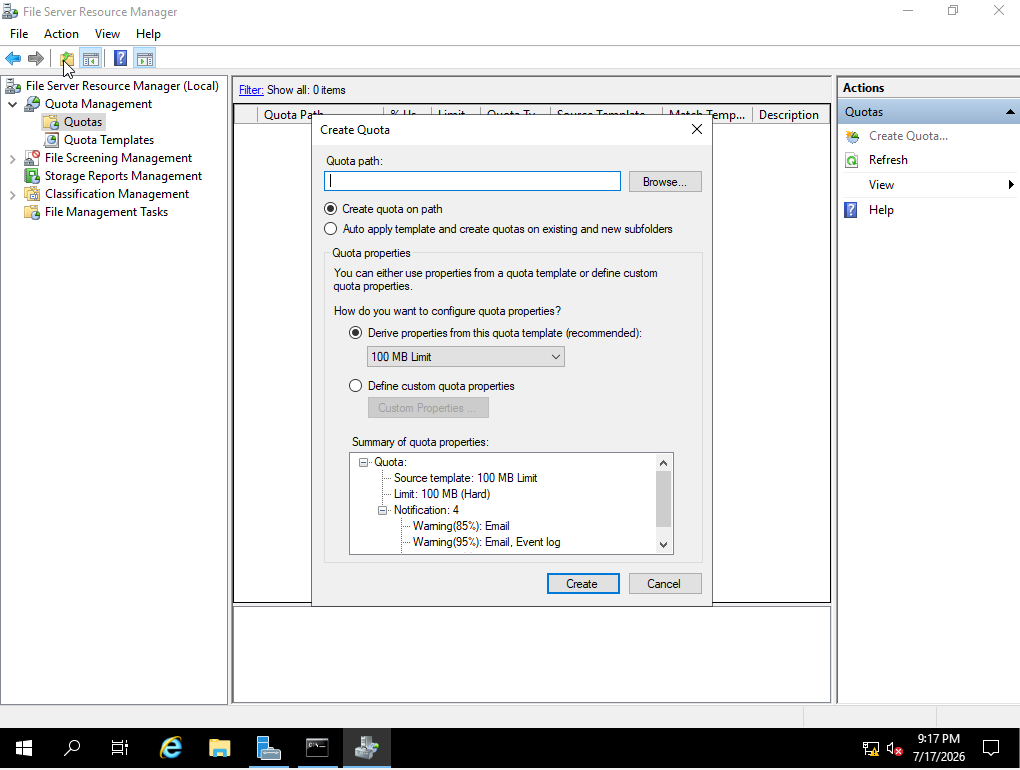
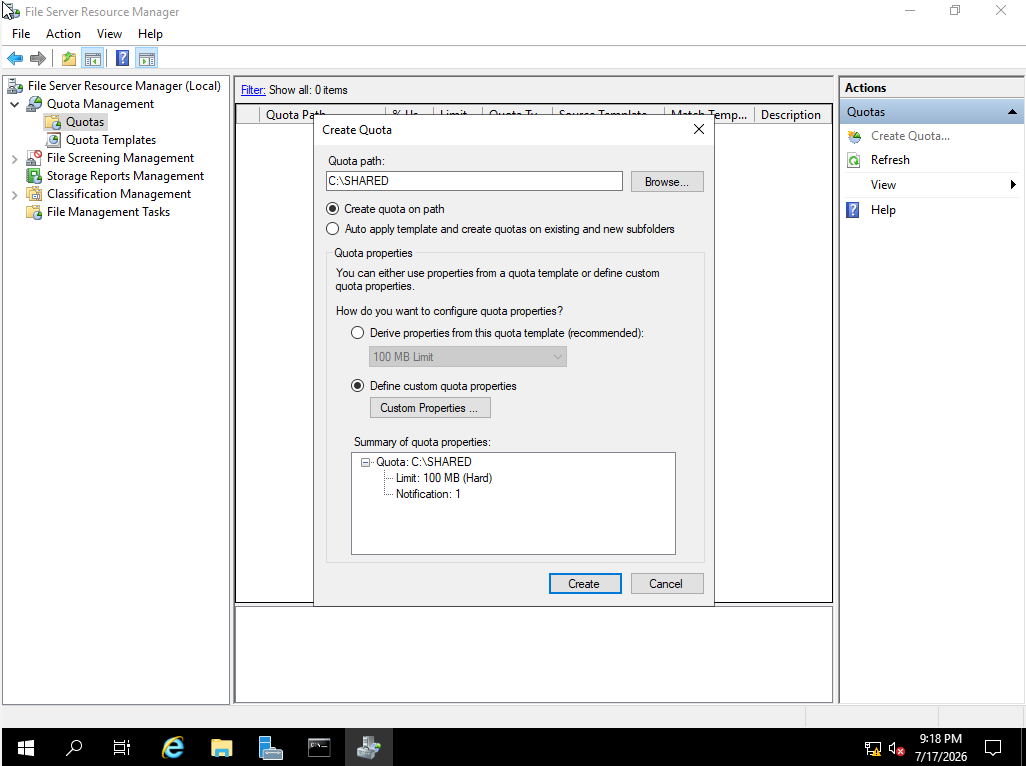
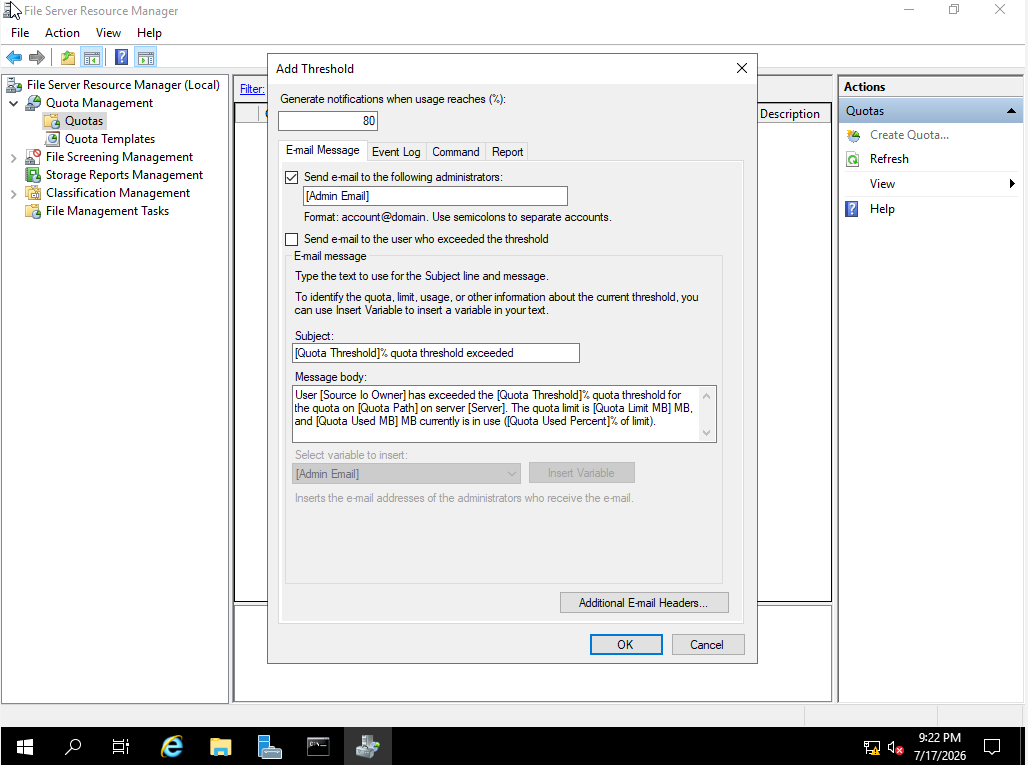
Selected the SHARED folder and defined quota properties to set a storage limit, with an email notification threshold.
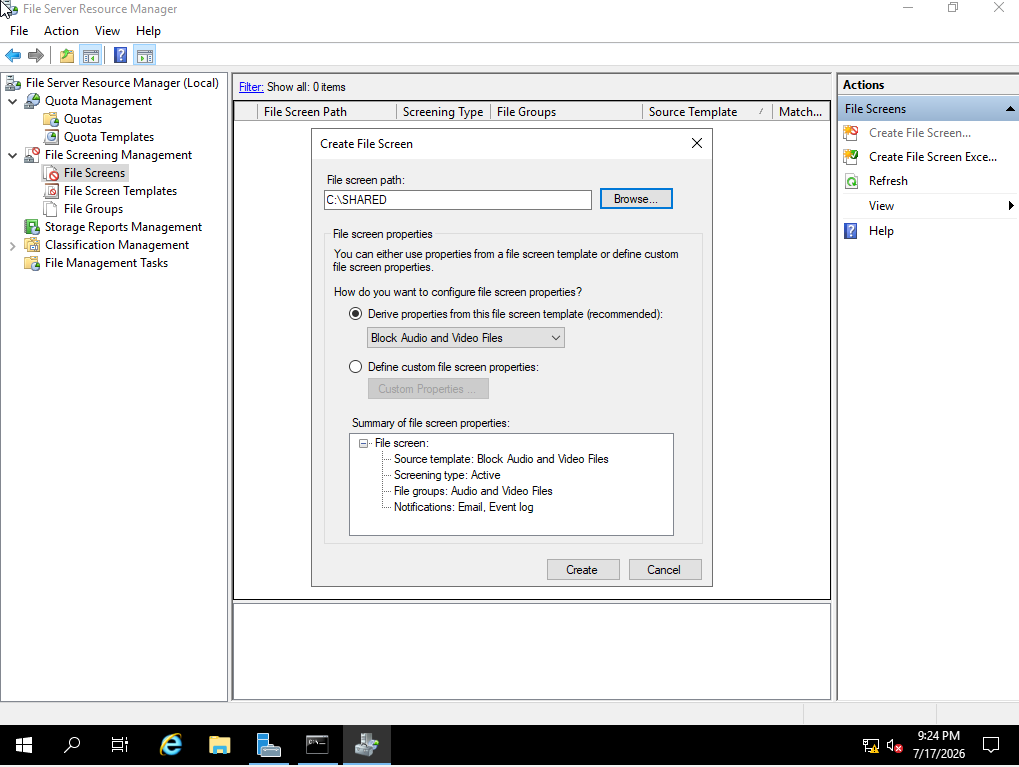
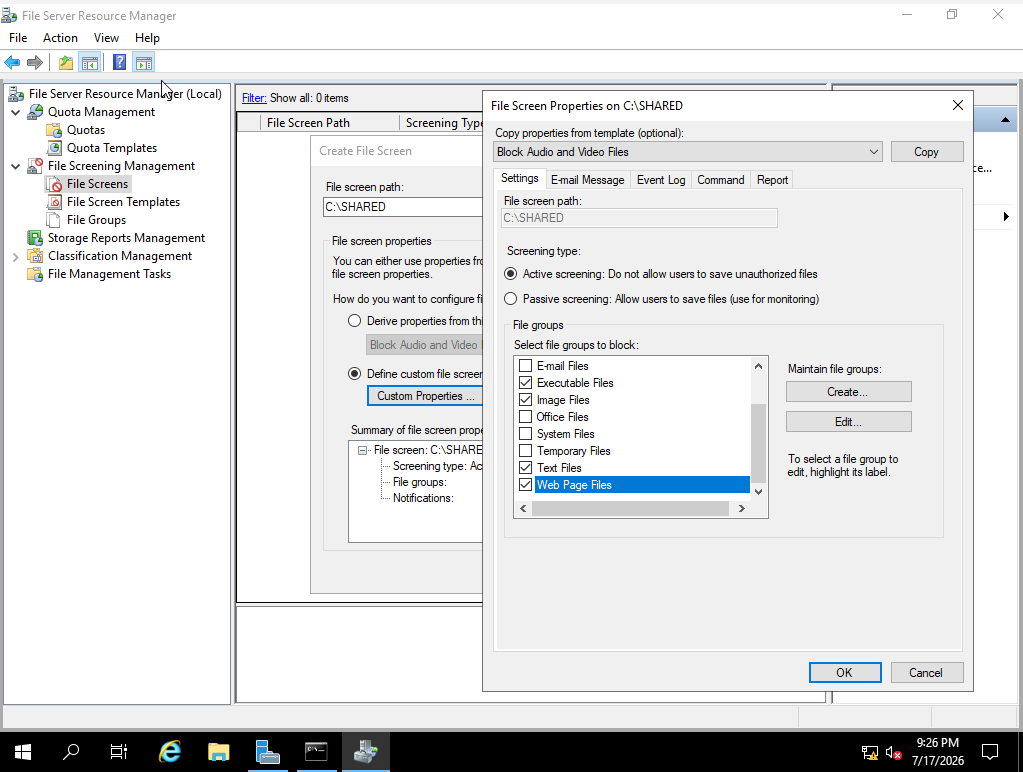
File Screening Management
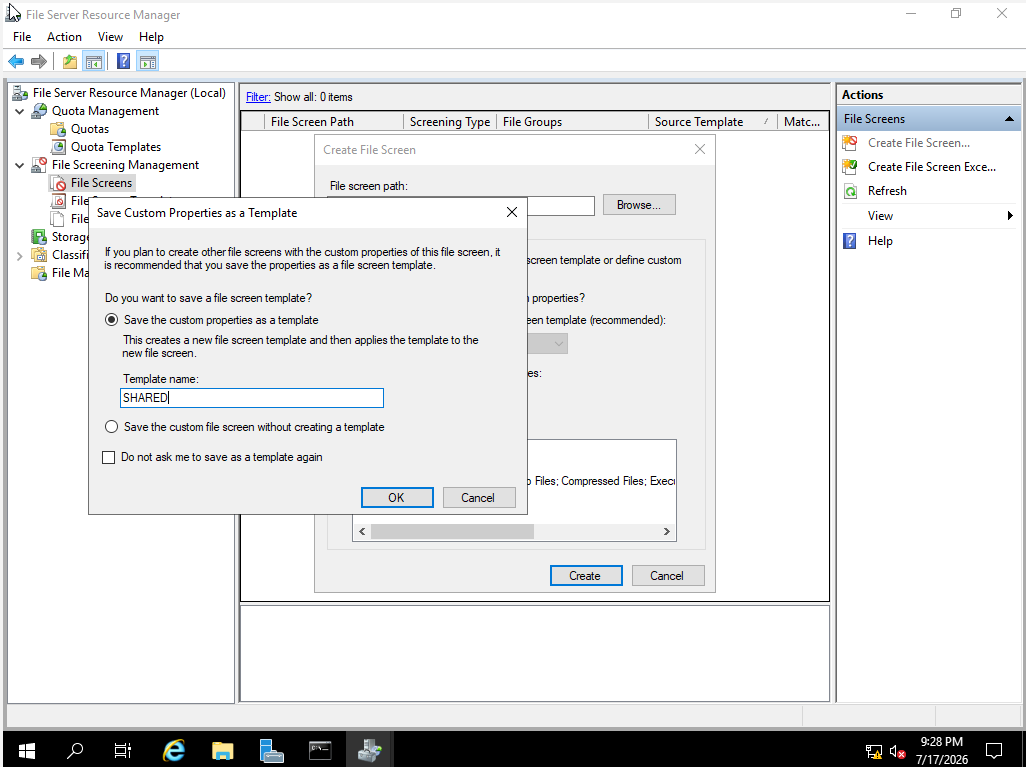
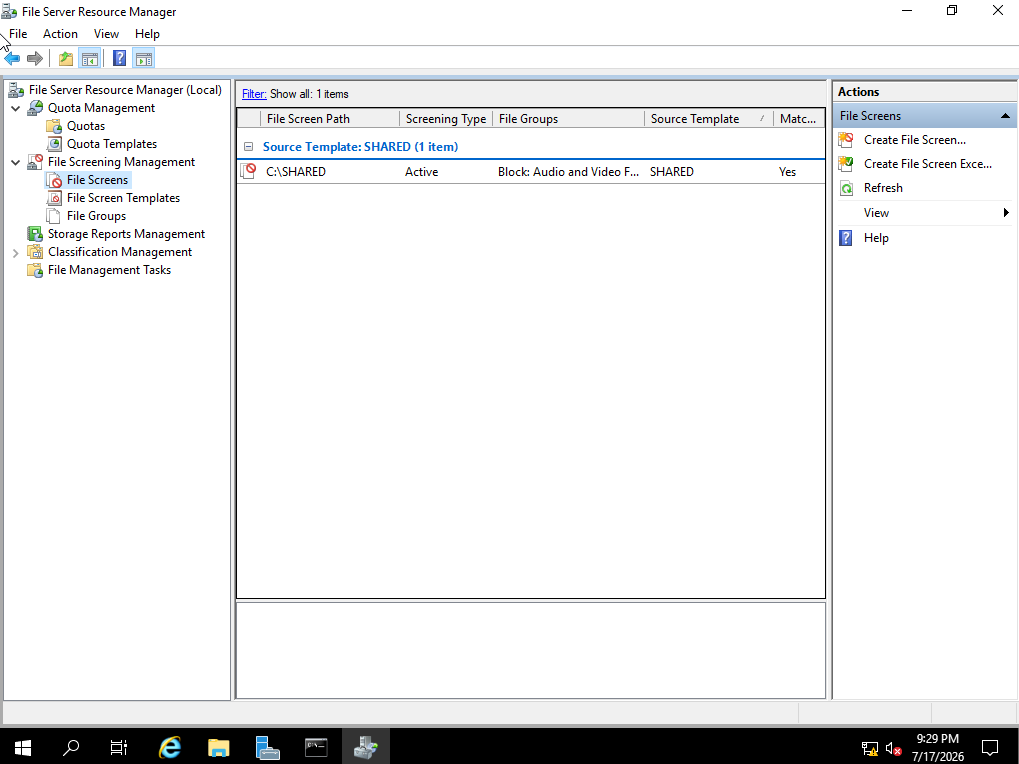
File screening allows administrators to control which file types users can save on a server and to generate notifications when unauthorized files are attempted. Blocked Audio and Video Files, Compressed Files, Executable Files, Web Page Files, Image Files, and Text Files on the SHARED folder, and saved the configuration as a reusable template named SHARED.
✓Key Learnings
- Promoted a Windows Server 2019 instance to a fully functioning Active Directory domain controller from scratch
- Designed a regional + departmental OU structure (USA / Europe / Asia → IT, Accounting, HR, Sales, Management) that mirrors how real enterprise domains are organized
- Practiced the difference between Universal, Global, and Domain Local group scopes, and Security vs Distribution group types
- Built and tested multiple Group Policy Objects covering password security, account lockout, USB restriction, drive mapping, and desktop standardization
- Reinforced how centralized policy management reduces manual configuration across many machines and enforces consistent security baselines
- Joined a Windows 10 client to the domain end-to-end — configuring DNS correctly, verifying connectivity with
nslookup, and troubleshooting before attempting the join - Practiced keeping Active Directory tidy by moving newly joined computer objects out of the default container and into the correct Organizational Unit
- Set up file sharing with matching NTFS and share permissions, scoped to Domain Users with Read access
- Automated network drive mapping across a domain using Group Policy Preferences, instead of relying on manual per-client setup
- Configured FSRM to enforce storage quotas with email alerts, and used file screening to block unauthorized file types on a shared resource